Easy Yeast Dough for Pizza Bread Dessert Pretzel Pirozhki
For many years of my "wifelihood" in the kitchen, one thing I feared the most was baking bread from scratch with yeast. Baking soda-baking powder duo, sure thing, no worries, quick bread, muffins, and waffles from scratch coming right up, but yeast was just a mystery. Eventually, the excitement of freshly baked sweets in our family dulled out, and I figured it was time to give the yeast a try. After all, only 6 main ingredients: water, yeast, sugar, salt, flour, and oil. Well, the word of advice, at the beginning of learning how to work with yeast doughs, do not go for an advanced recipe like Cinnabon Cinnamon Rolls from scratch, just start with the small basic steps: a loaf of bread, or a flatbread, or even a pizza crust.
If you are scared of failure in preparing dough with yeast, then do not be, just try and try again until your brain forms some patterns or signs to look for. To simplify the science behind the yeast: yeast ferments the dough in warm (faster) and cold (slower) temperatures and fermentation causes the gases to leaven, or raise the dough. The word proofing seen in many yeast recipes means rising (most of the time for the second or third rise, the final one). Because it can be confusing to figure out the difference between active dry yeast and rapid dry yeast, one or two rising periods, too much flour, or not enough flour with too sticky of a mess to handle, baking with yeast dough can become a total disaster and disappointment. But hold on, do not despair, and leave all the guesswork to professional bakers to follow proper procedures. This recipe for homemade bread and pizza crust with yeast is simple and failure-proof. Even in the case where you overlooked the expiration date on your yeast packet (trust me, been there, done that, ending up with the brick-hard flatbread that the dogs played with like a chew toy).
Yeast packets are air sealed, thus staying inactive. Once opened, the air (and moisture in the air) will start the yeast activation process (ever seen dark jars of dry yeast with instructions to keep refrigerated once opened). When bread/pizza recipes tell us to leave our dough to rise for about an hour (or wait till doubled) at a warm temperature (around 80 degrees F), that is usually the first rise, then work the dough again, form the shapes, and proof again for 15-30 minutes. This method depends on many factors to succeed: humidity in the air, indoor temperature, draft-free environment (usually inside an oven or even wrapped in a blankie on the sofa), elevation, how long you kneaded the dough to activate those gluten proteins, etc etc. It seems like until you have total control of each variant, the recipe will keep turning out differently at the end each time.
When I found out that the main "trick" to Domino's pizza tasting like Domino's was refrigerating (or slow proofing) the crust dough, I simply started applying this method to most of my baking with yeast. Cold dough is easier to handle and shape, even when sticky. The raising of the dough still happens at the cold temperature (50-60 degrees F), just so much slower. You can keep your dough in the fridge for up to 2 days without any flavor change, but on the 3rd day it will start tasting slightly sour and on day 7, it will just be turning into a sourdough starter-like funky smelly thing. So if all the dough did not get used up in 48 hours, freeze it and defrost it later on the days you need it.
A few pointers to help understand yeast in general:
1. By refrigerating the dough, I noticed I did not have to knead the dough for 15-20 minutes, but simply mix up all the ingredients into uniform goo and whallah (the wetter the dough - the softer the bread, too much flour will make it harder).
2. When adding oil, I usually apply it towards the end of mixing once the mass is nearly formed, that way the oil will prevent sticking to the container sides while it's in the refrigerator increasing its size (if you add the 1 tablespoon of oil in the mixture per most recipes, then you still would need to oil on outside to prevent sticking, thus too much oil will cause sort of bitter taste in the final product).
3. I prefer to use sunflower oil because it's very gentle without any noticeable flavor afterward so I can use the same dough and split it into amounts for a small pizza crust, a pastry bun with a jelly filling, and even a boiled breadstick (or boiled rolls for those who love white inside more) for a pretzel-like bread to dip in the soup. If you choose to use olive oil, it does a good job for pizza in my opinion but not so much for dessert. Any vegetable oil, canola, or corn oil, each has a hardly noticeable effect, so try different ones but whatever is on hand is usually the main determinant in our family.
4. When forming the shape of your desired baked masterpiece, I prefer to oil my hands instead of sprinkling with flour (only because my son will get upset if he sees a little white spot of flour anywhere on his baked pizza crust), but on my chili bread bowls, I have to roll them on the floured surface because flour helps to achieve that final extra hard outer crunch to keep the soup or chili from leaking out.
5. Do not sweat about the flour types. Start with all-purpose flour and experiment with the other kinds as your baking confidence grows. Bread flour is higher in gluten (the yeast-feeding protein) causing a chewy effect (great for frozen-like pizzas or pizzeria-clone pizza crusts, crunchy rolls, and chili bread bowls), wheat flour adds sponginess and brown color, and all-purpose flour just plain soft, not overly soft, white looking inside. You can use ratios of 3 different types of flour: all-purpose, bread, or wheat for slightly various outcomes. For example, the chewiness of three-fourths of bread flour will be slightly less if added one-fourth of the spongy-causing wheat flour. Half all-purpose and half-bread flour ratio will make a thin pizza crust crunchy enough without turning into chips. And of course, Neopolitan pizza and its 00 four is altogether a separate topic.


No Fail Yeast Dough Recipe by SimpleGoodIdeas.com AKA Lazy Pizza Crust Flatbread No-Knead Bread
4 cups flour (see pointer #5 for flour differences) = 480-500g
2 cups warm water (for pizza crusts) OR 2 cups of warm milk (for expired yeast packet or baked dessert buns or boiled rolls and pizza crusts) = 240-250g
1 packet of dry yeast (active dry yeast preferred but fast rise yeast is ok) = 2-1/4 teaspoon = 7g = 1/4 oz
2 tablespoons sugar = 25g
1 teaspoon salt = 6-7g (fine sea salt proved the best results)
2 tablespoons oil = 28-30g (see pointer #3 for oil types)
Instructions:
1. I prefer to start by dissolving yeast in warm milk (or water) with sugar or you can mix all ingredients in one bowl at the same time. The final outcome does not vary by much. Even cold water (milk) still works. But TOO HOT will kill yeast.
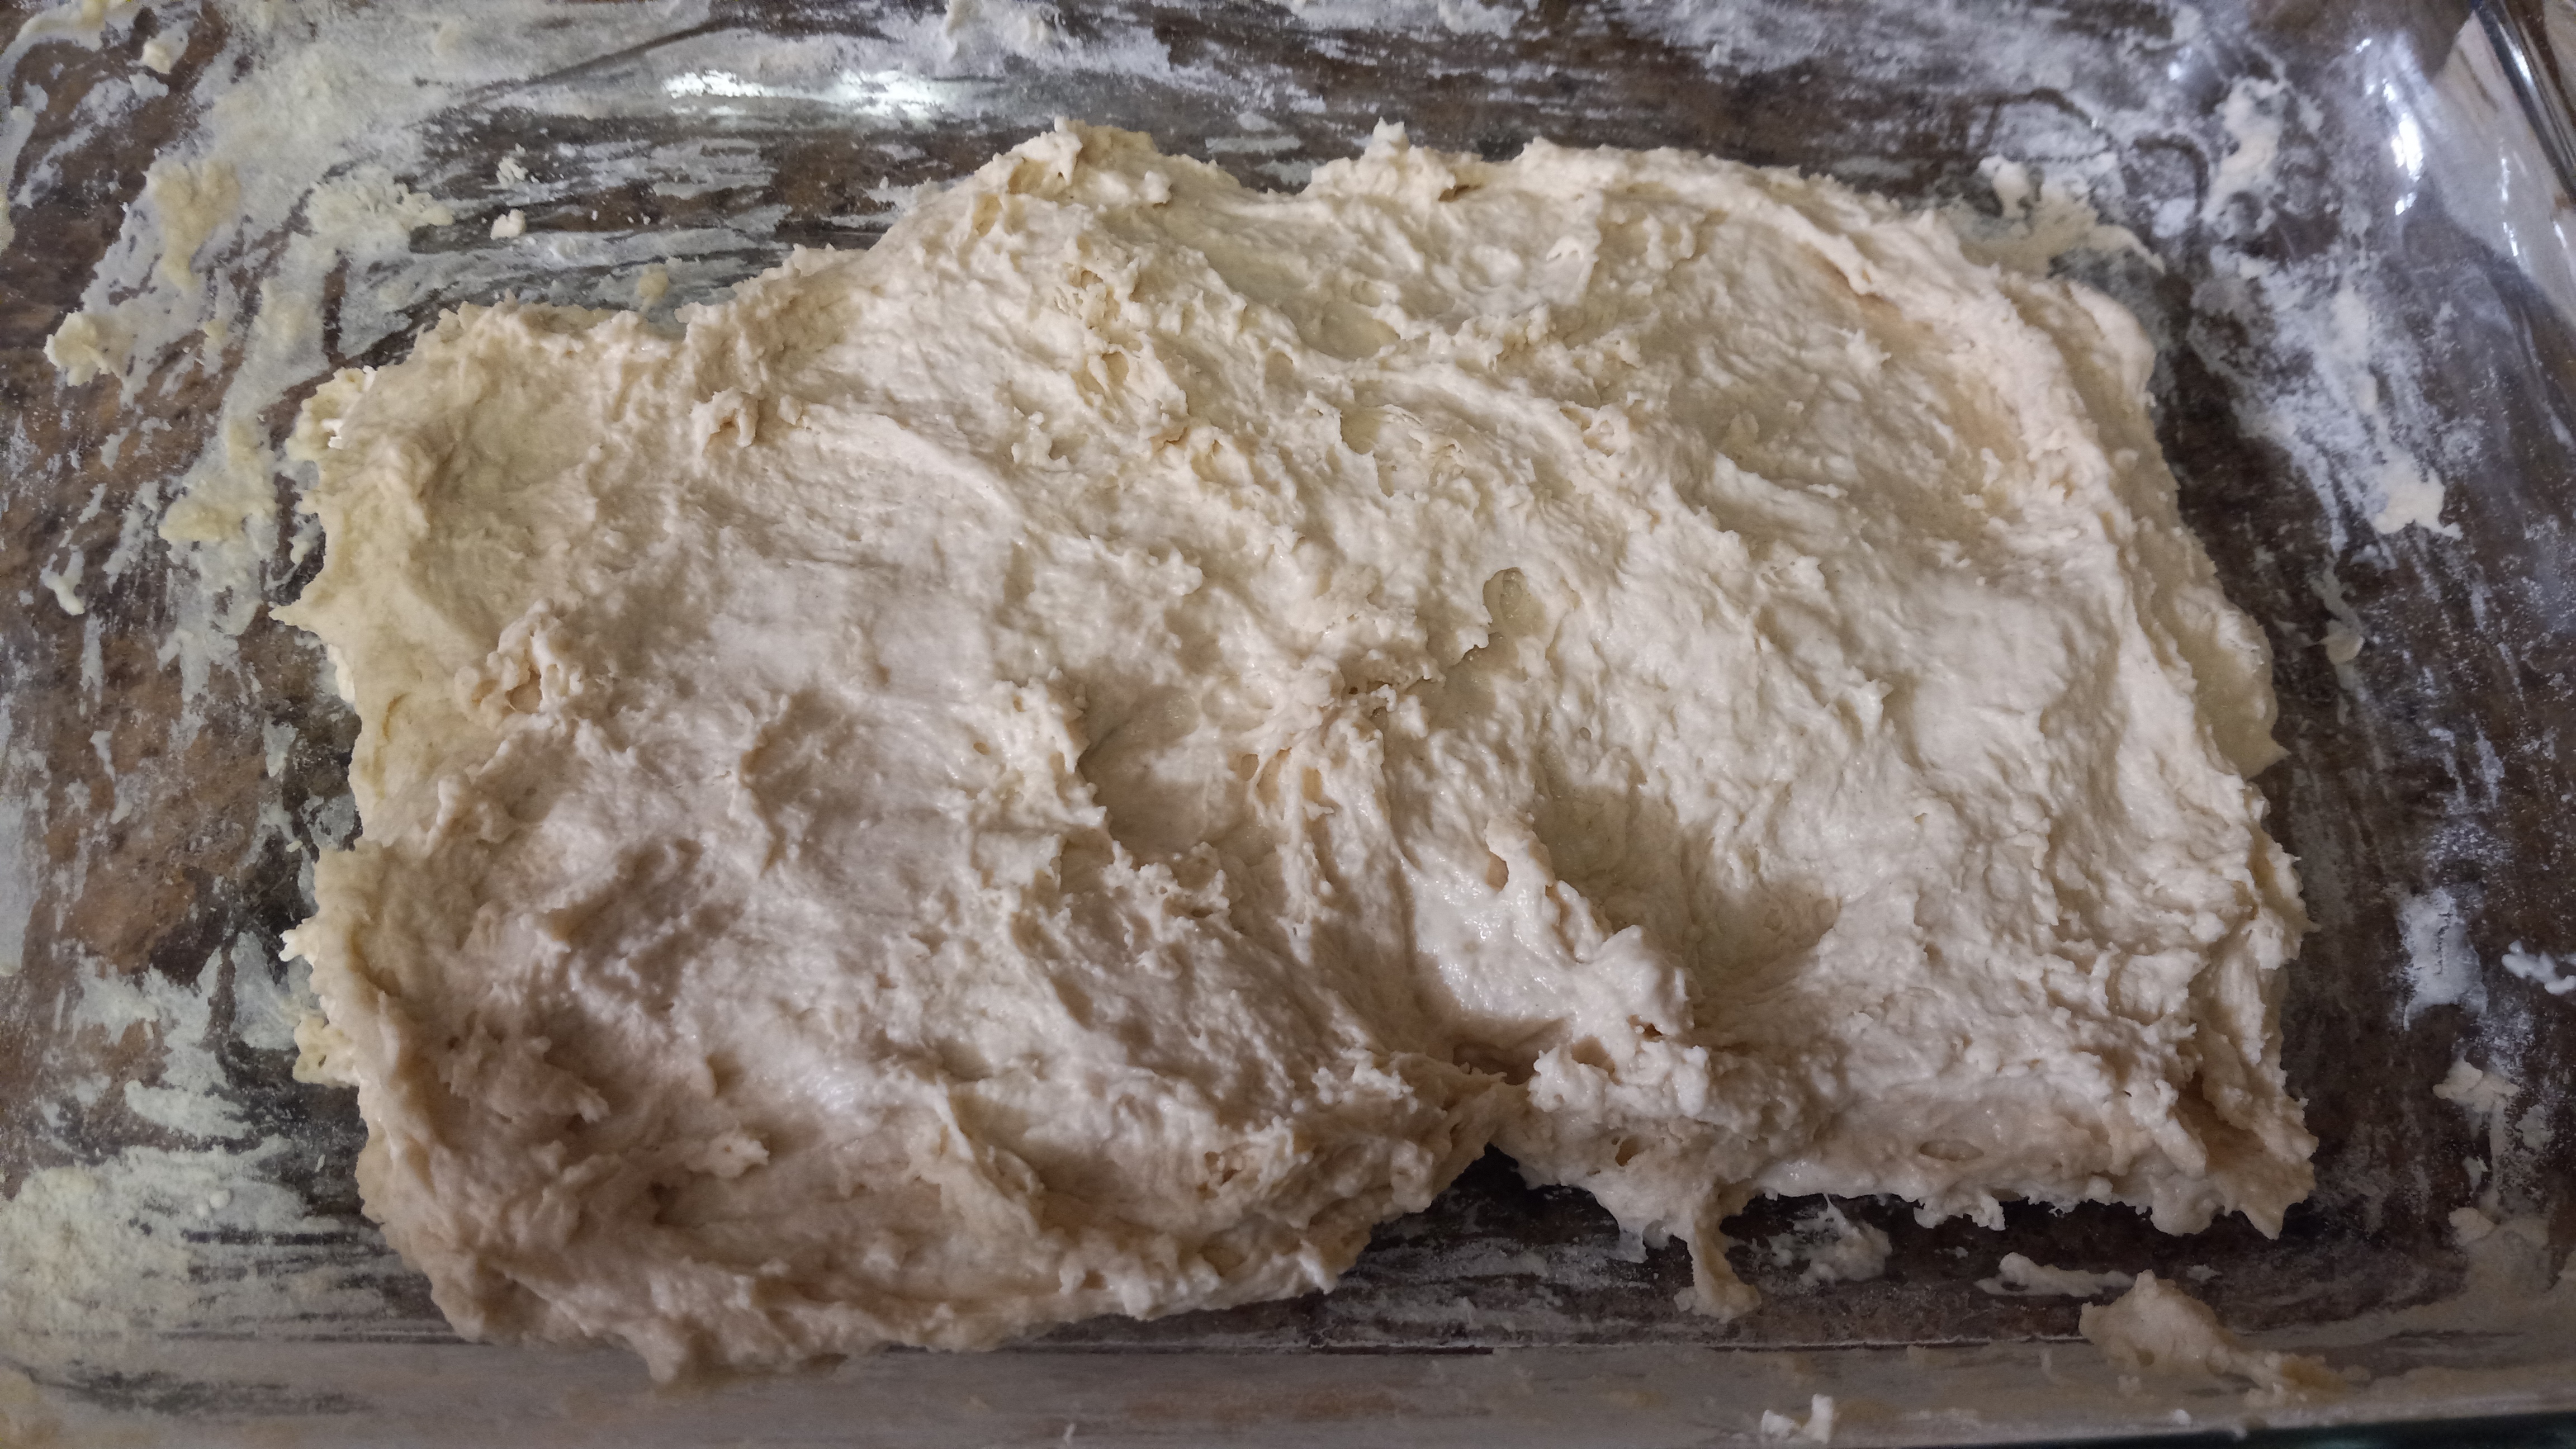
2. Mix 4 cups of flour (do not pack it) in a plastic container or glass bowl with 1 teaspoon fine salt.
3. Mix flour-salt mixture with milk-yeast mixture until well blended without dry flour spots.
4. Spread 1 tablespoon oil on the top side of dough, flip upside down, and spread the 2nd tablespoon oil on the other side of dough. Spread and rub it well with fingers or brush all over.
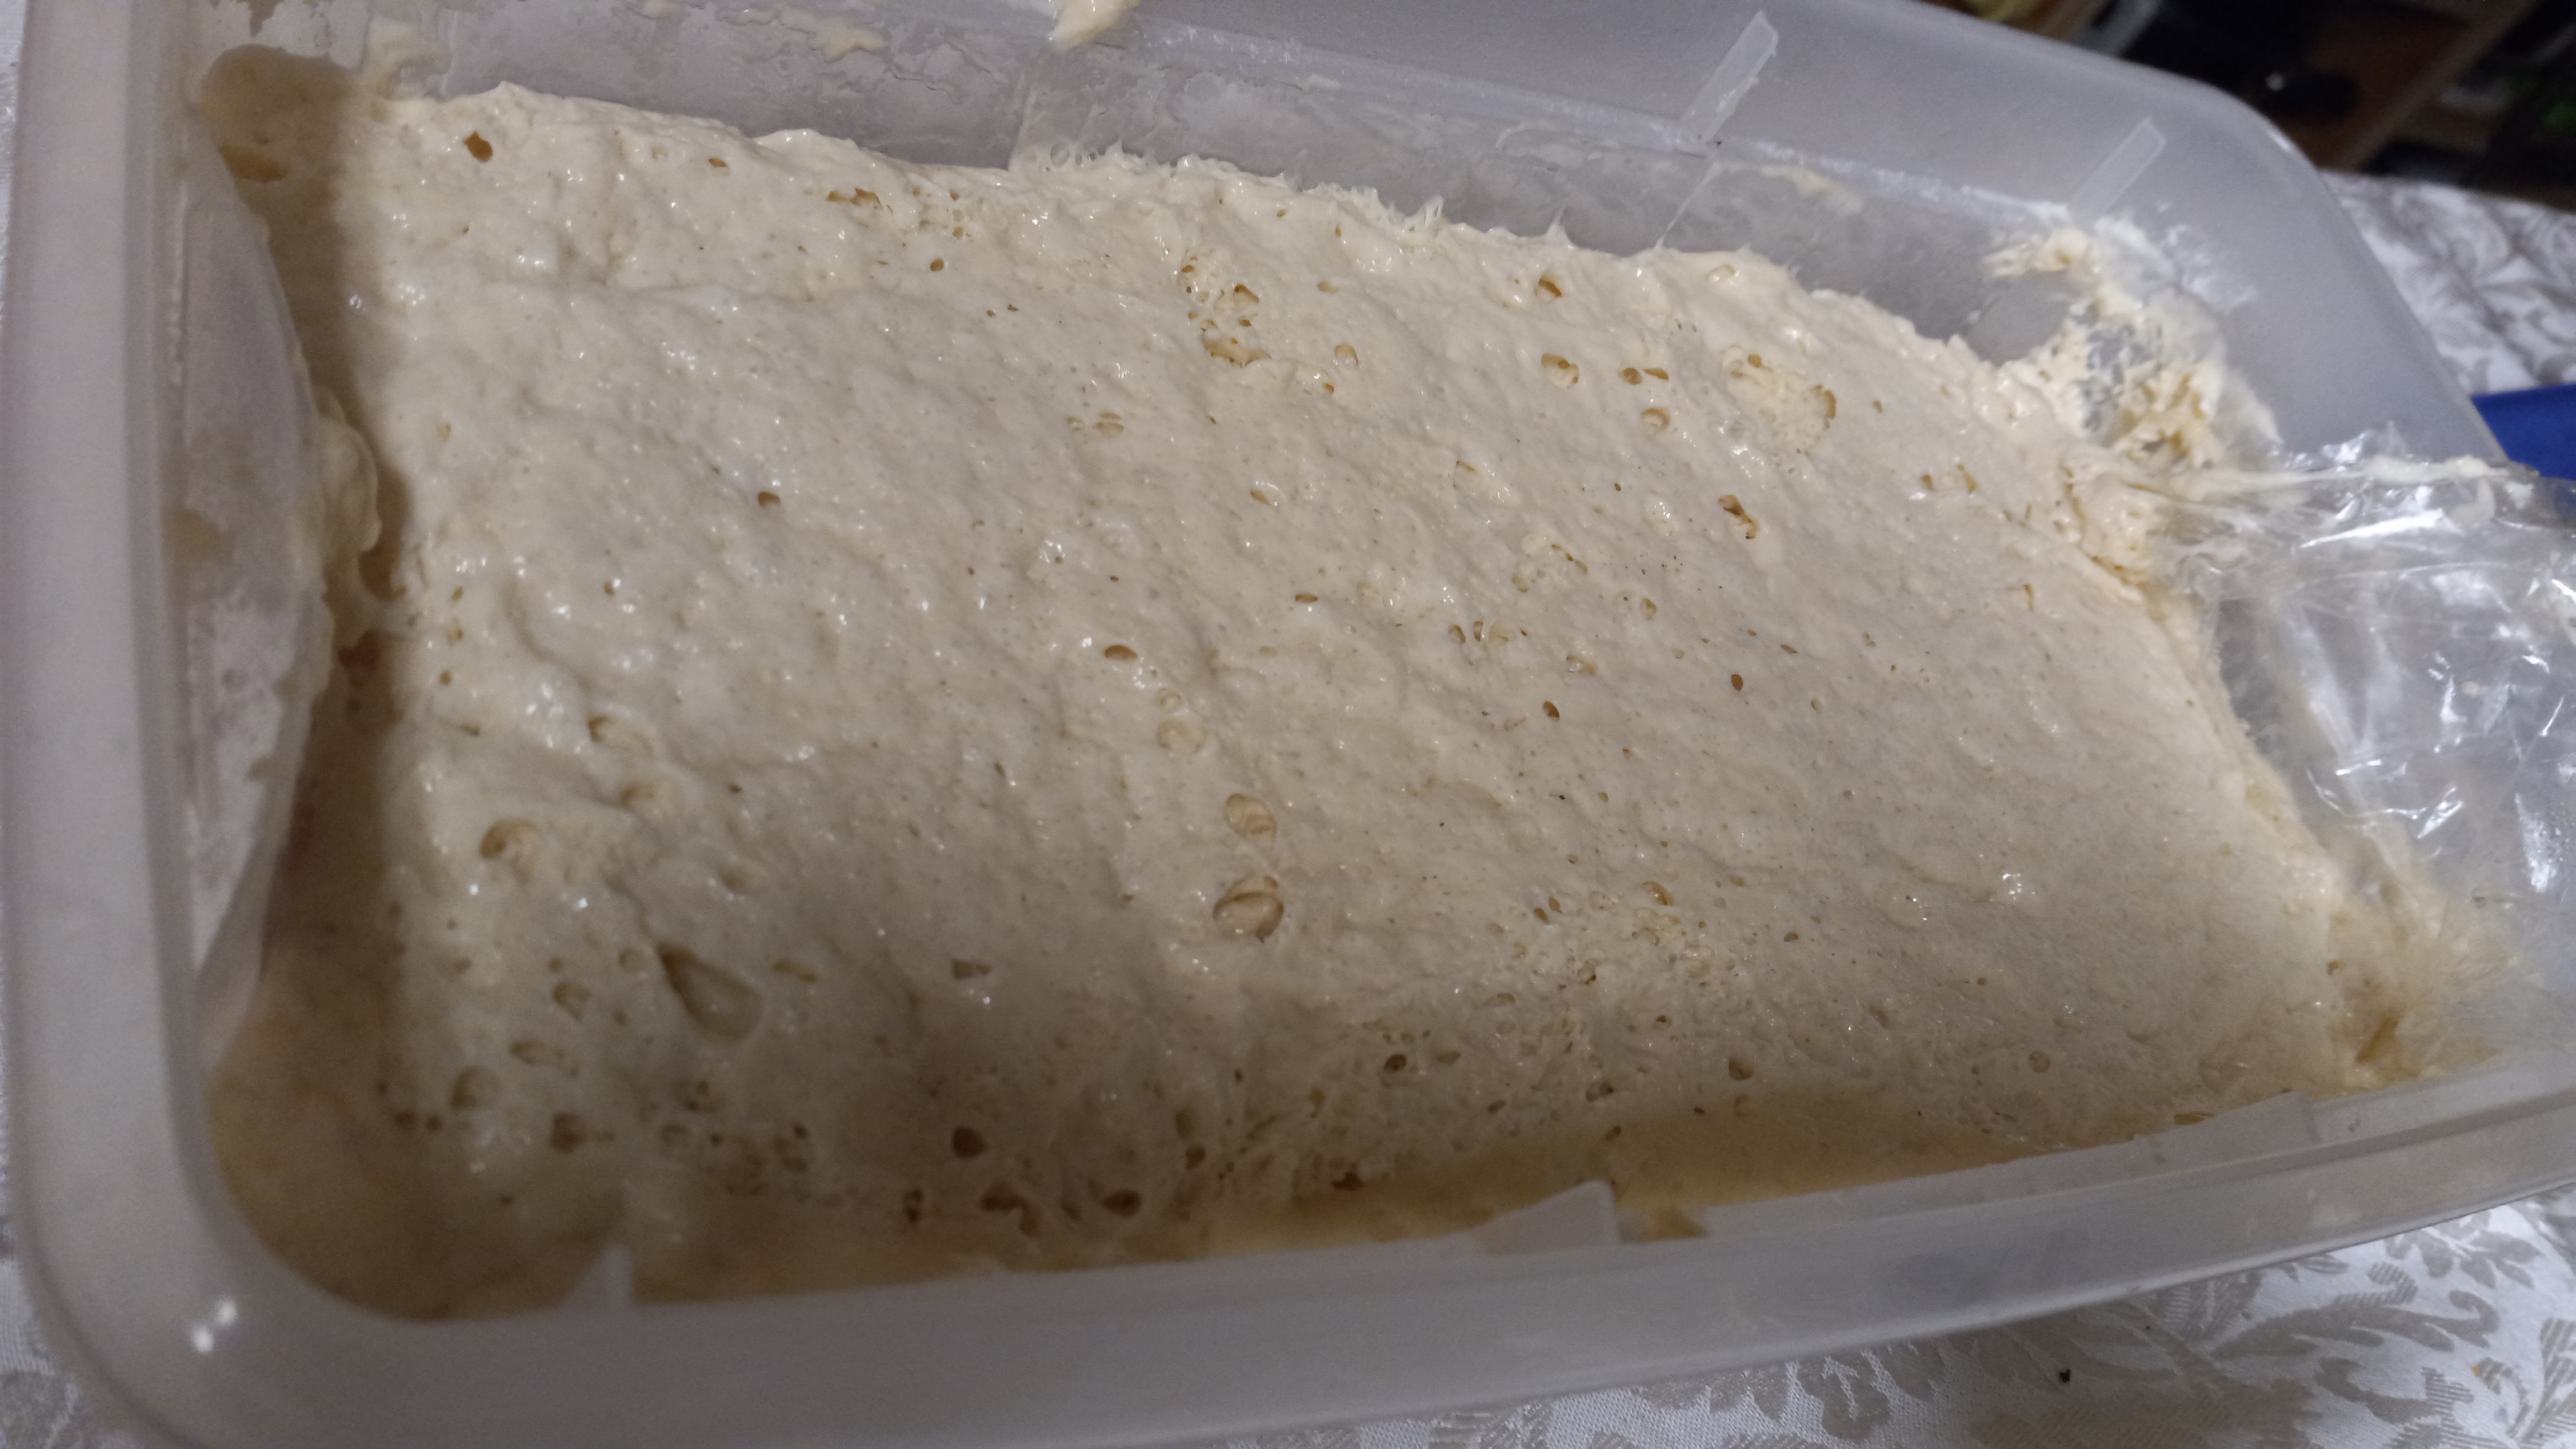
5. Cover with clear shrink wrap touching the dough and place container lid on top.
6. Leave on the counter 1-2 hours and then put into the refrigerator for up to 48 hours. Freeze if not used up after 2 days. The sour taste in the baked bread/crust will be evident if left in the fridge 3-7 days.
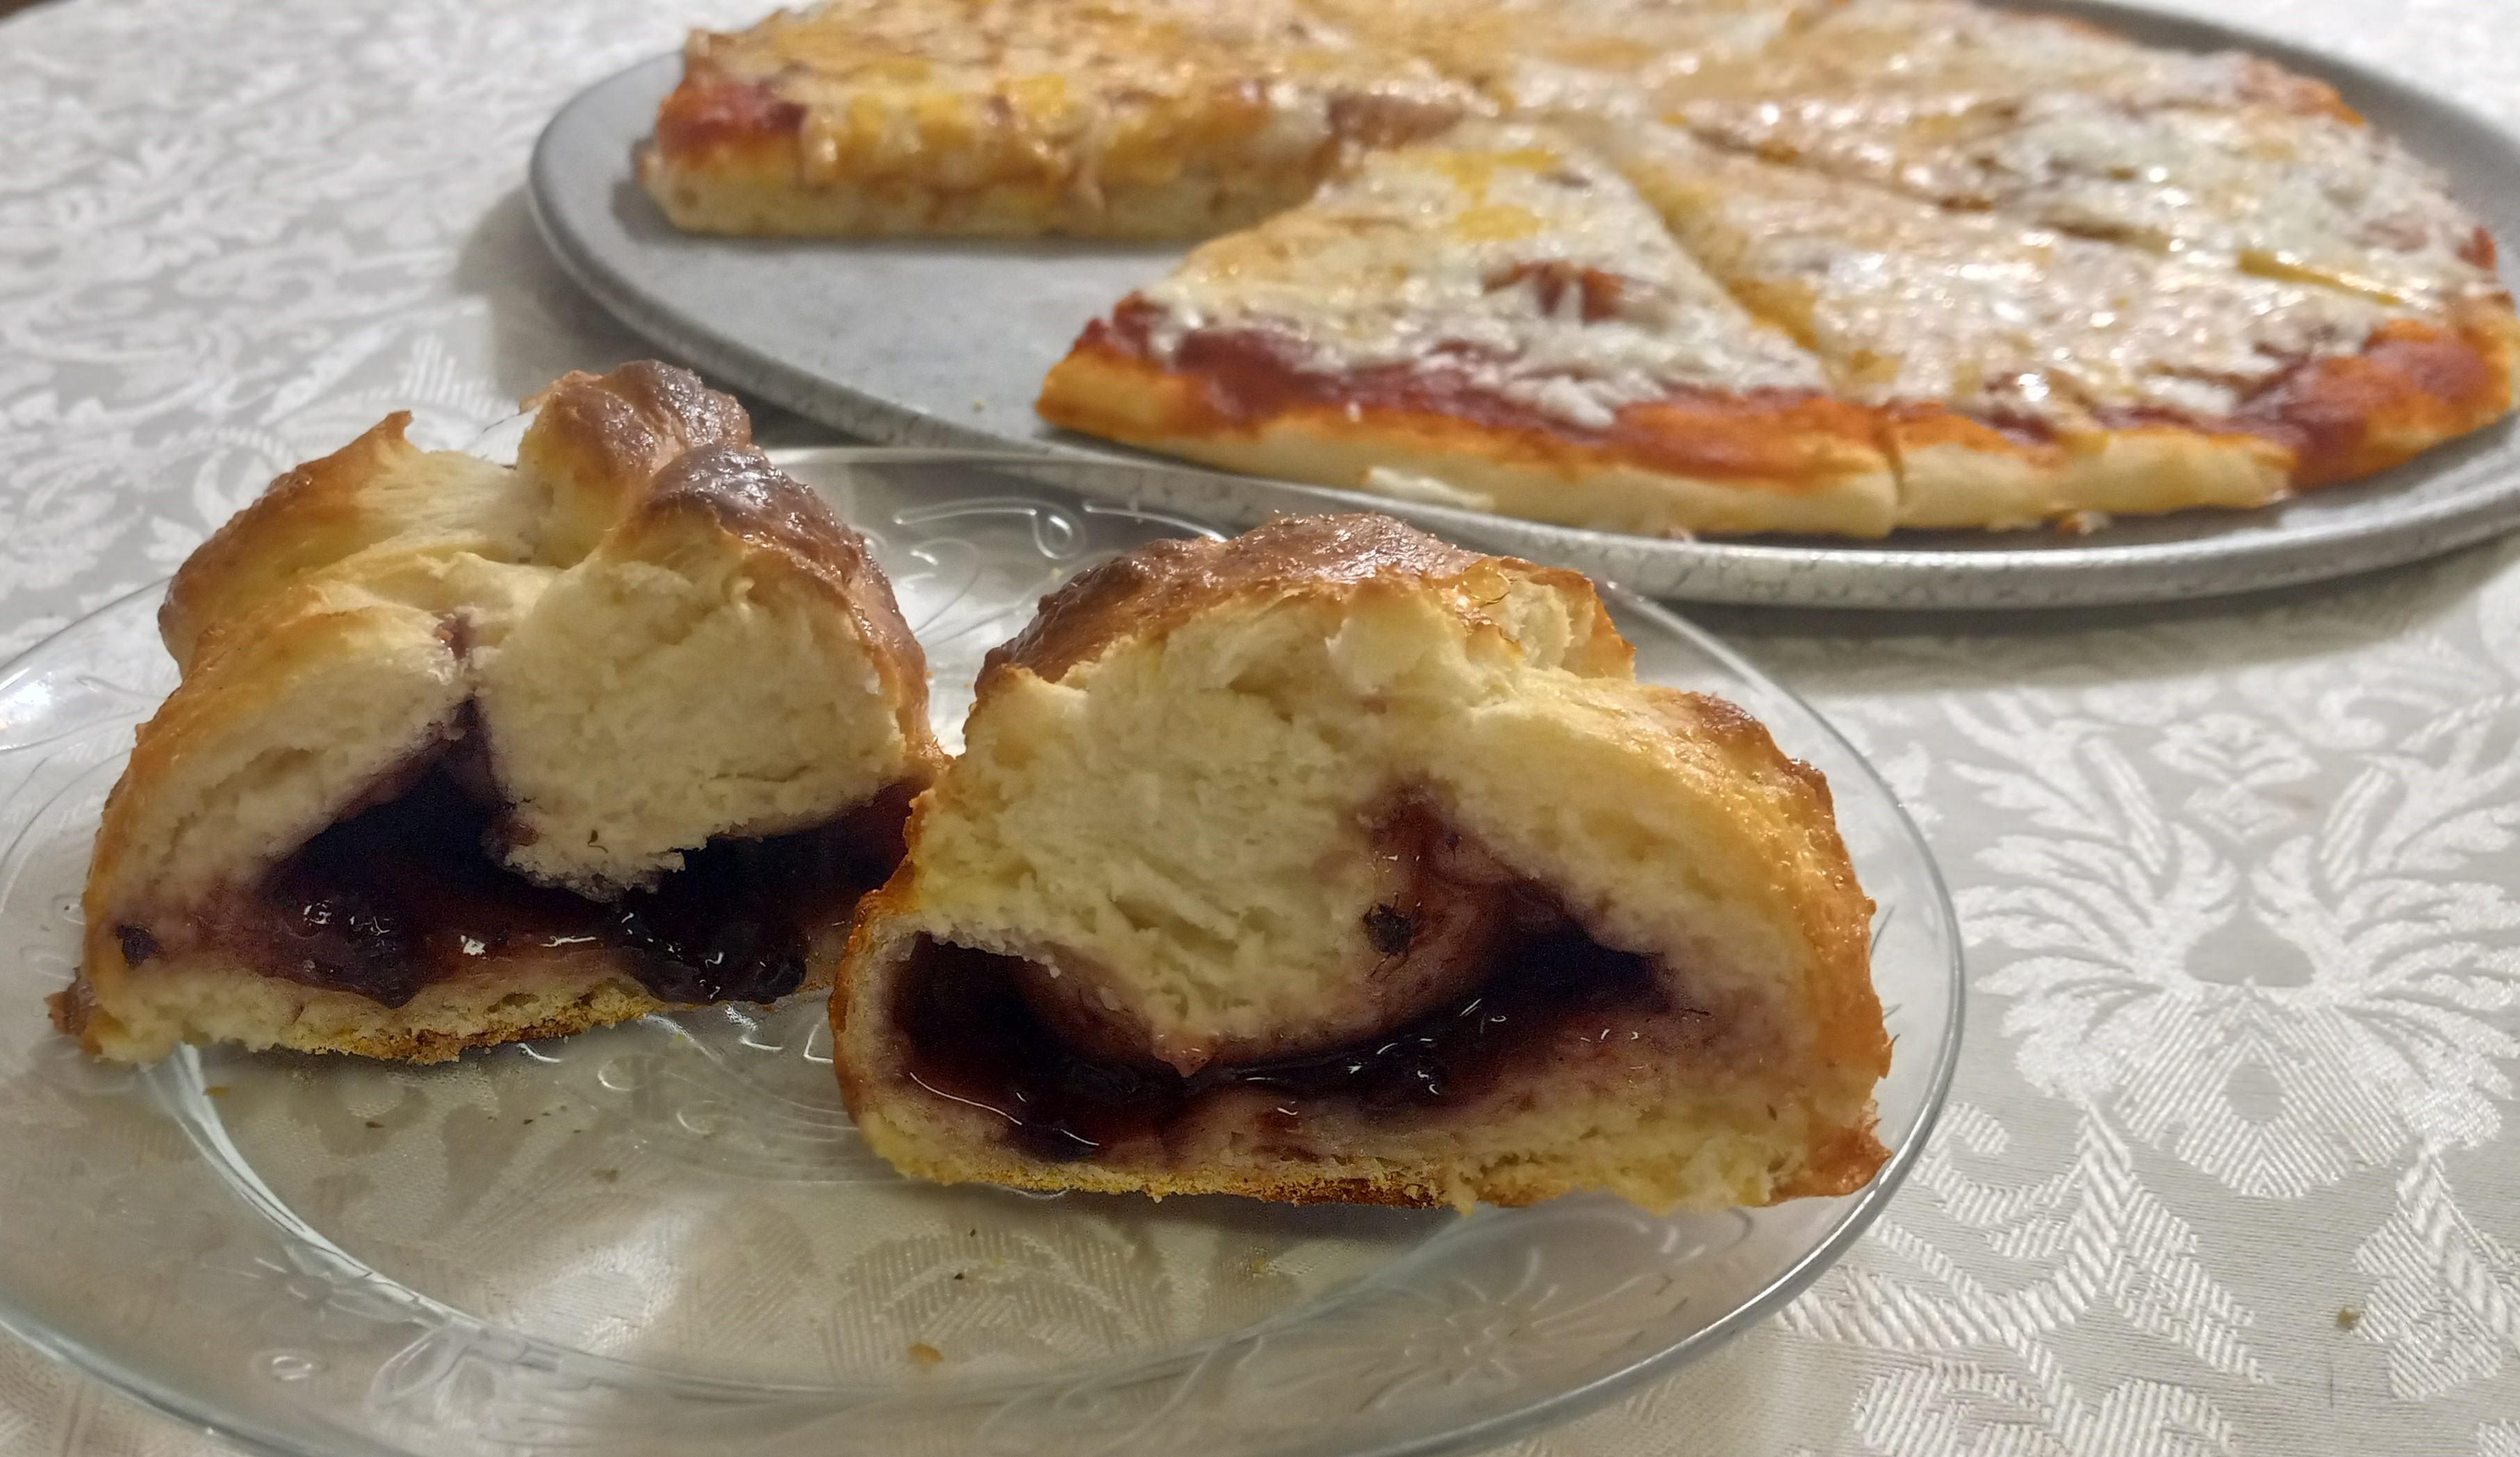
7. When ready to bake, tear off a handfull amount of dough from the container, return the container back into the fridge, and form your pizza crust or bread roll. Amounts in this recipe usually make 1 small 10-inch pizza, 2 chalupa style flatbreads, 2 boiled bread rolls (bread sticks), and 1-2 jam filled pastry buns. Or 2 large 18-inch pizzas, or 3 small pizza crusts, or 3 individual size no-knead bread bowls for chili soup.
8. Preheat oven and bake
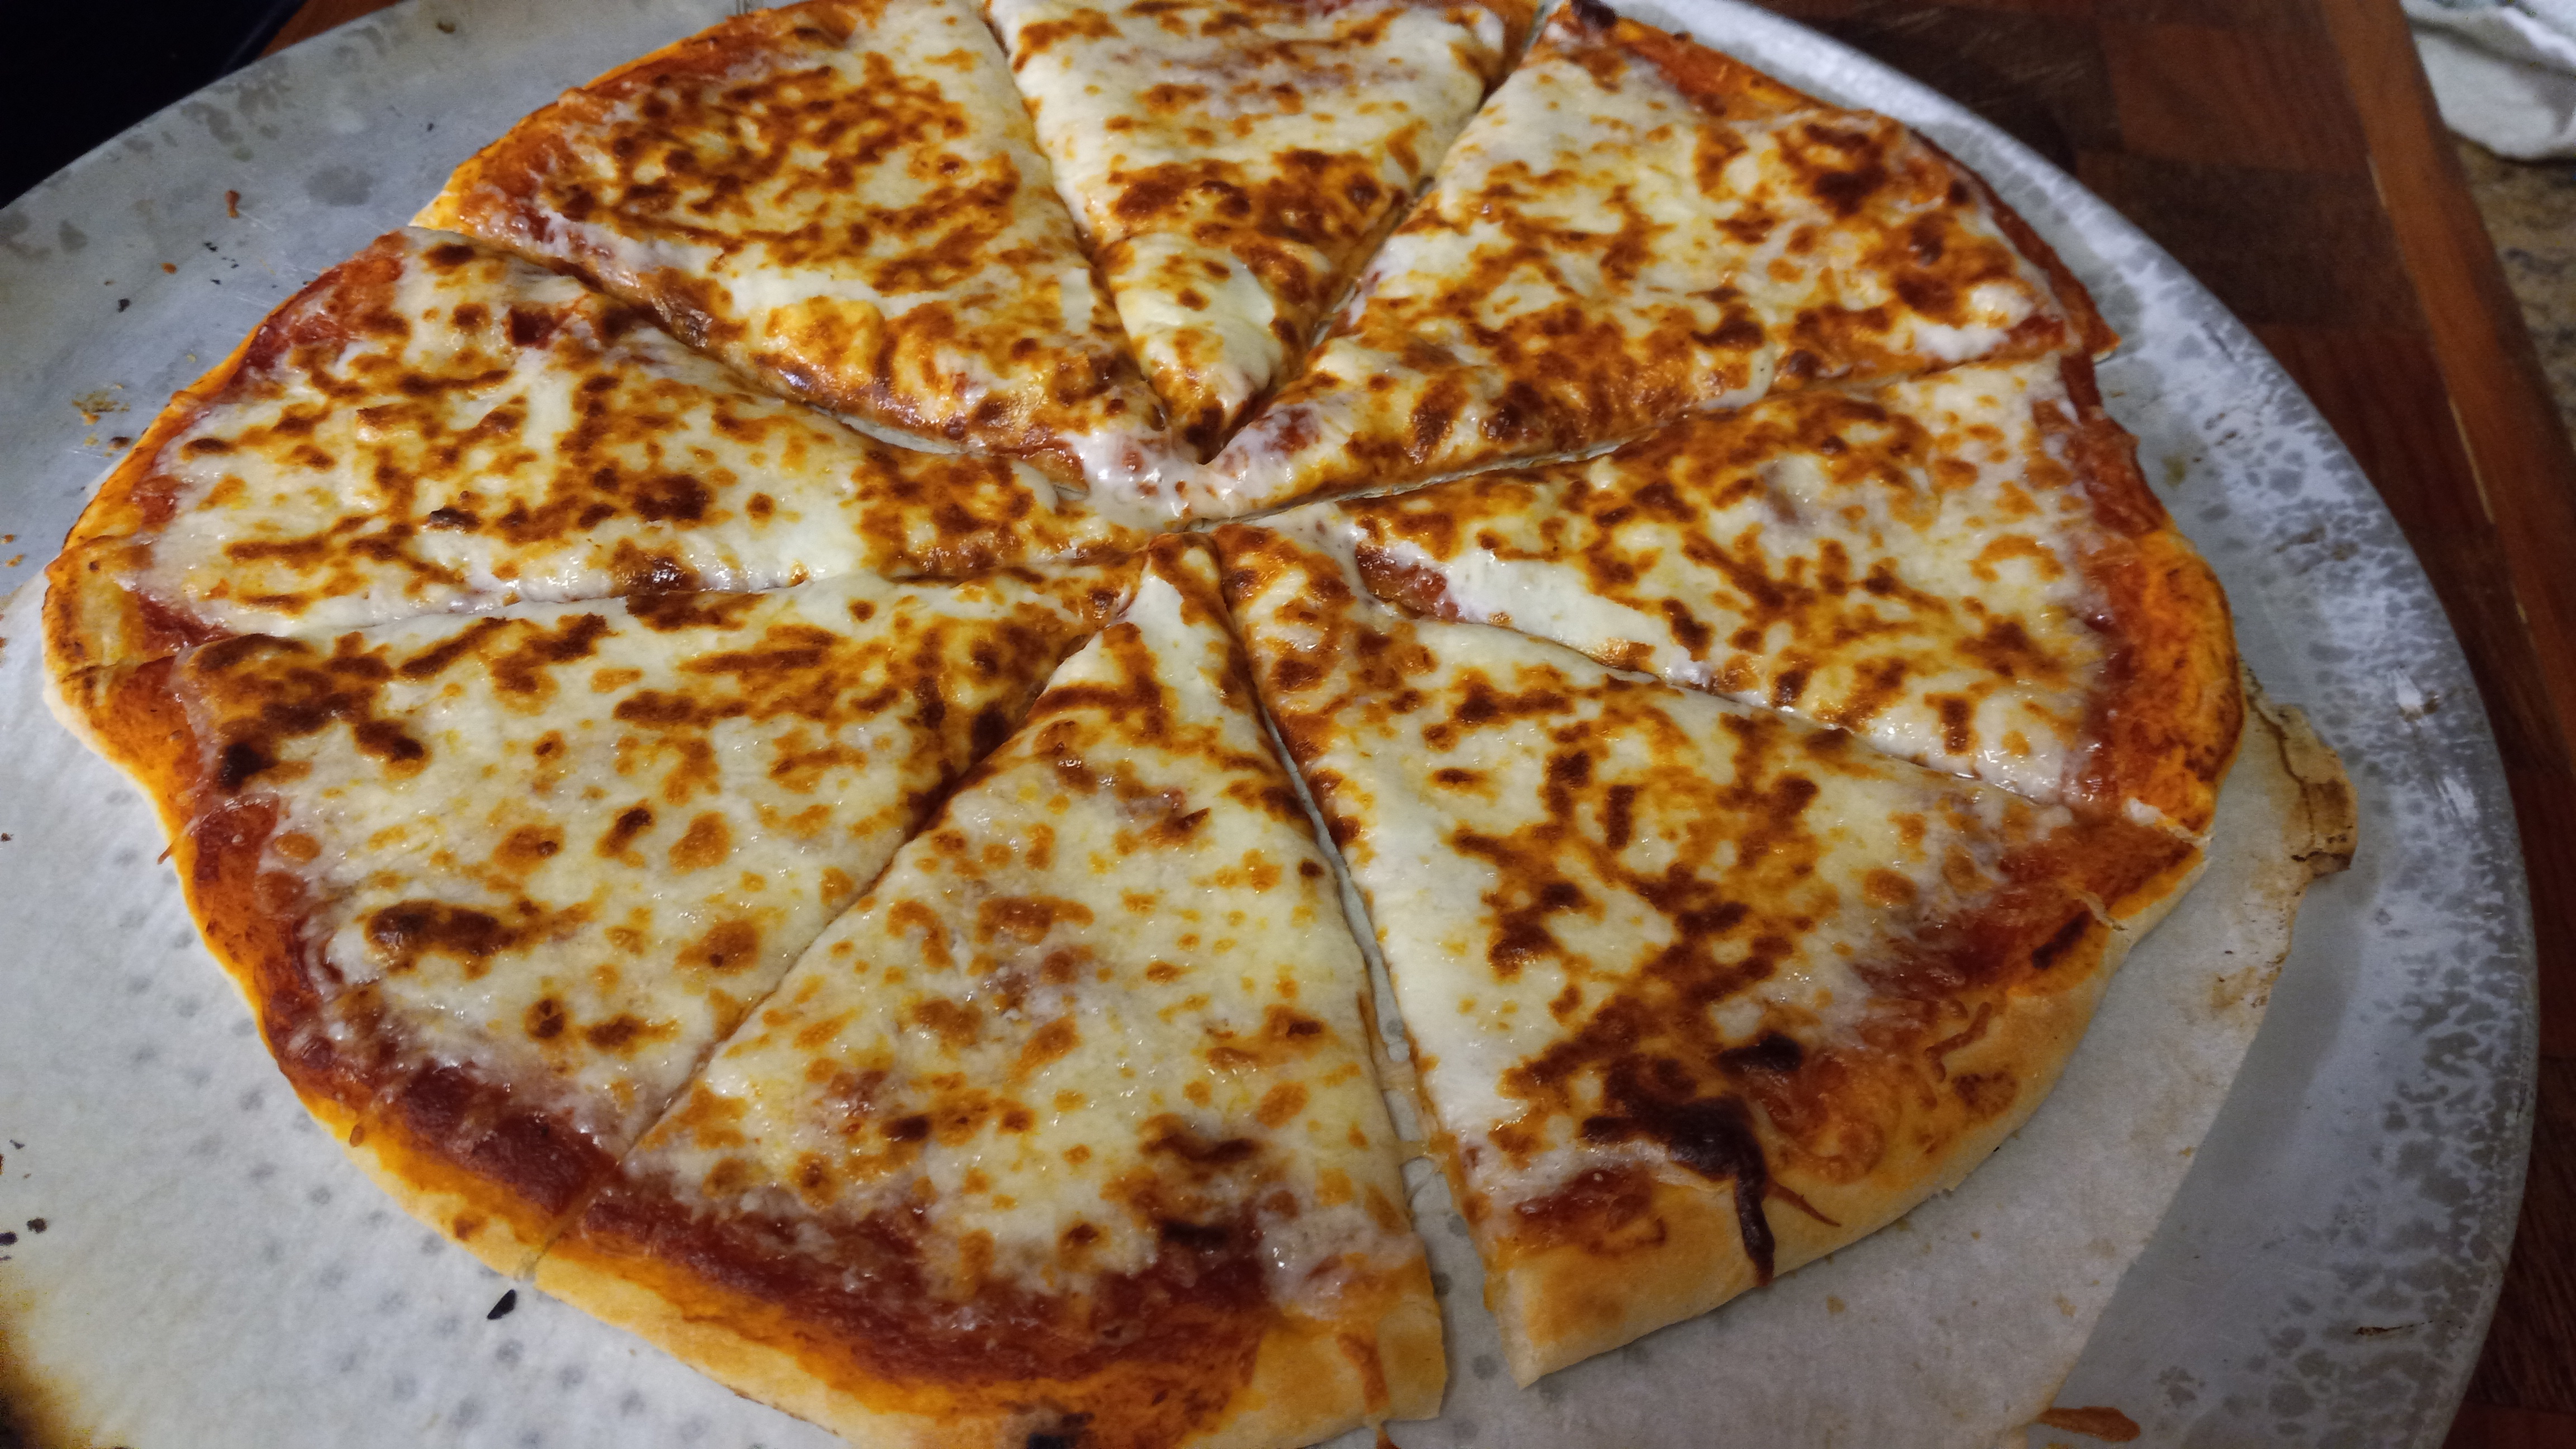
FOR PIZZA CRUST:
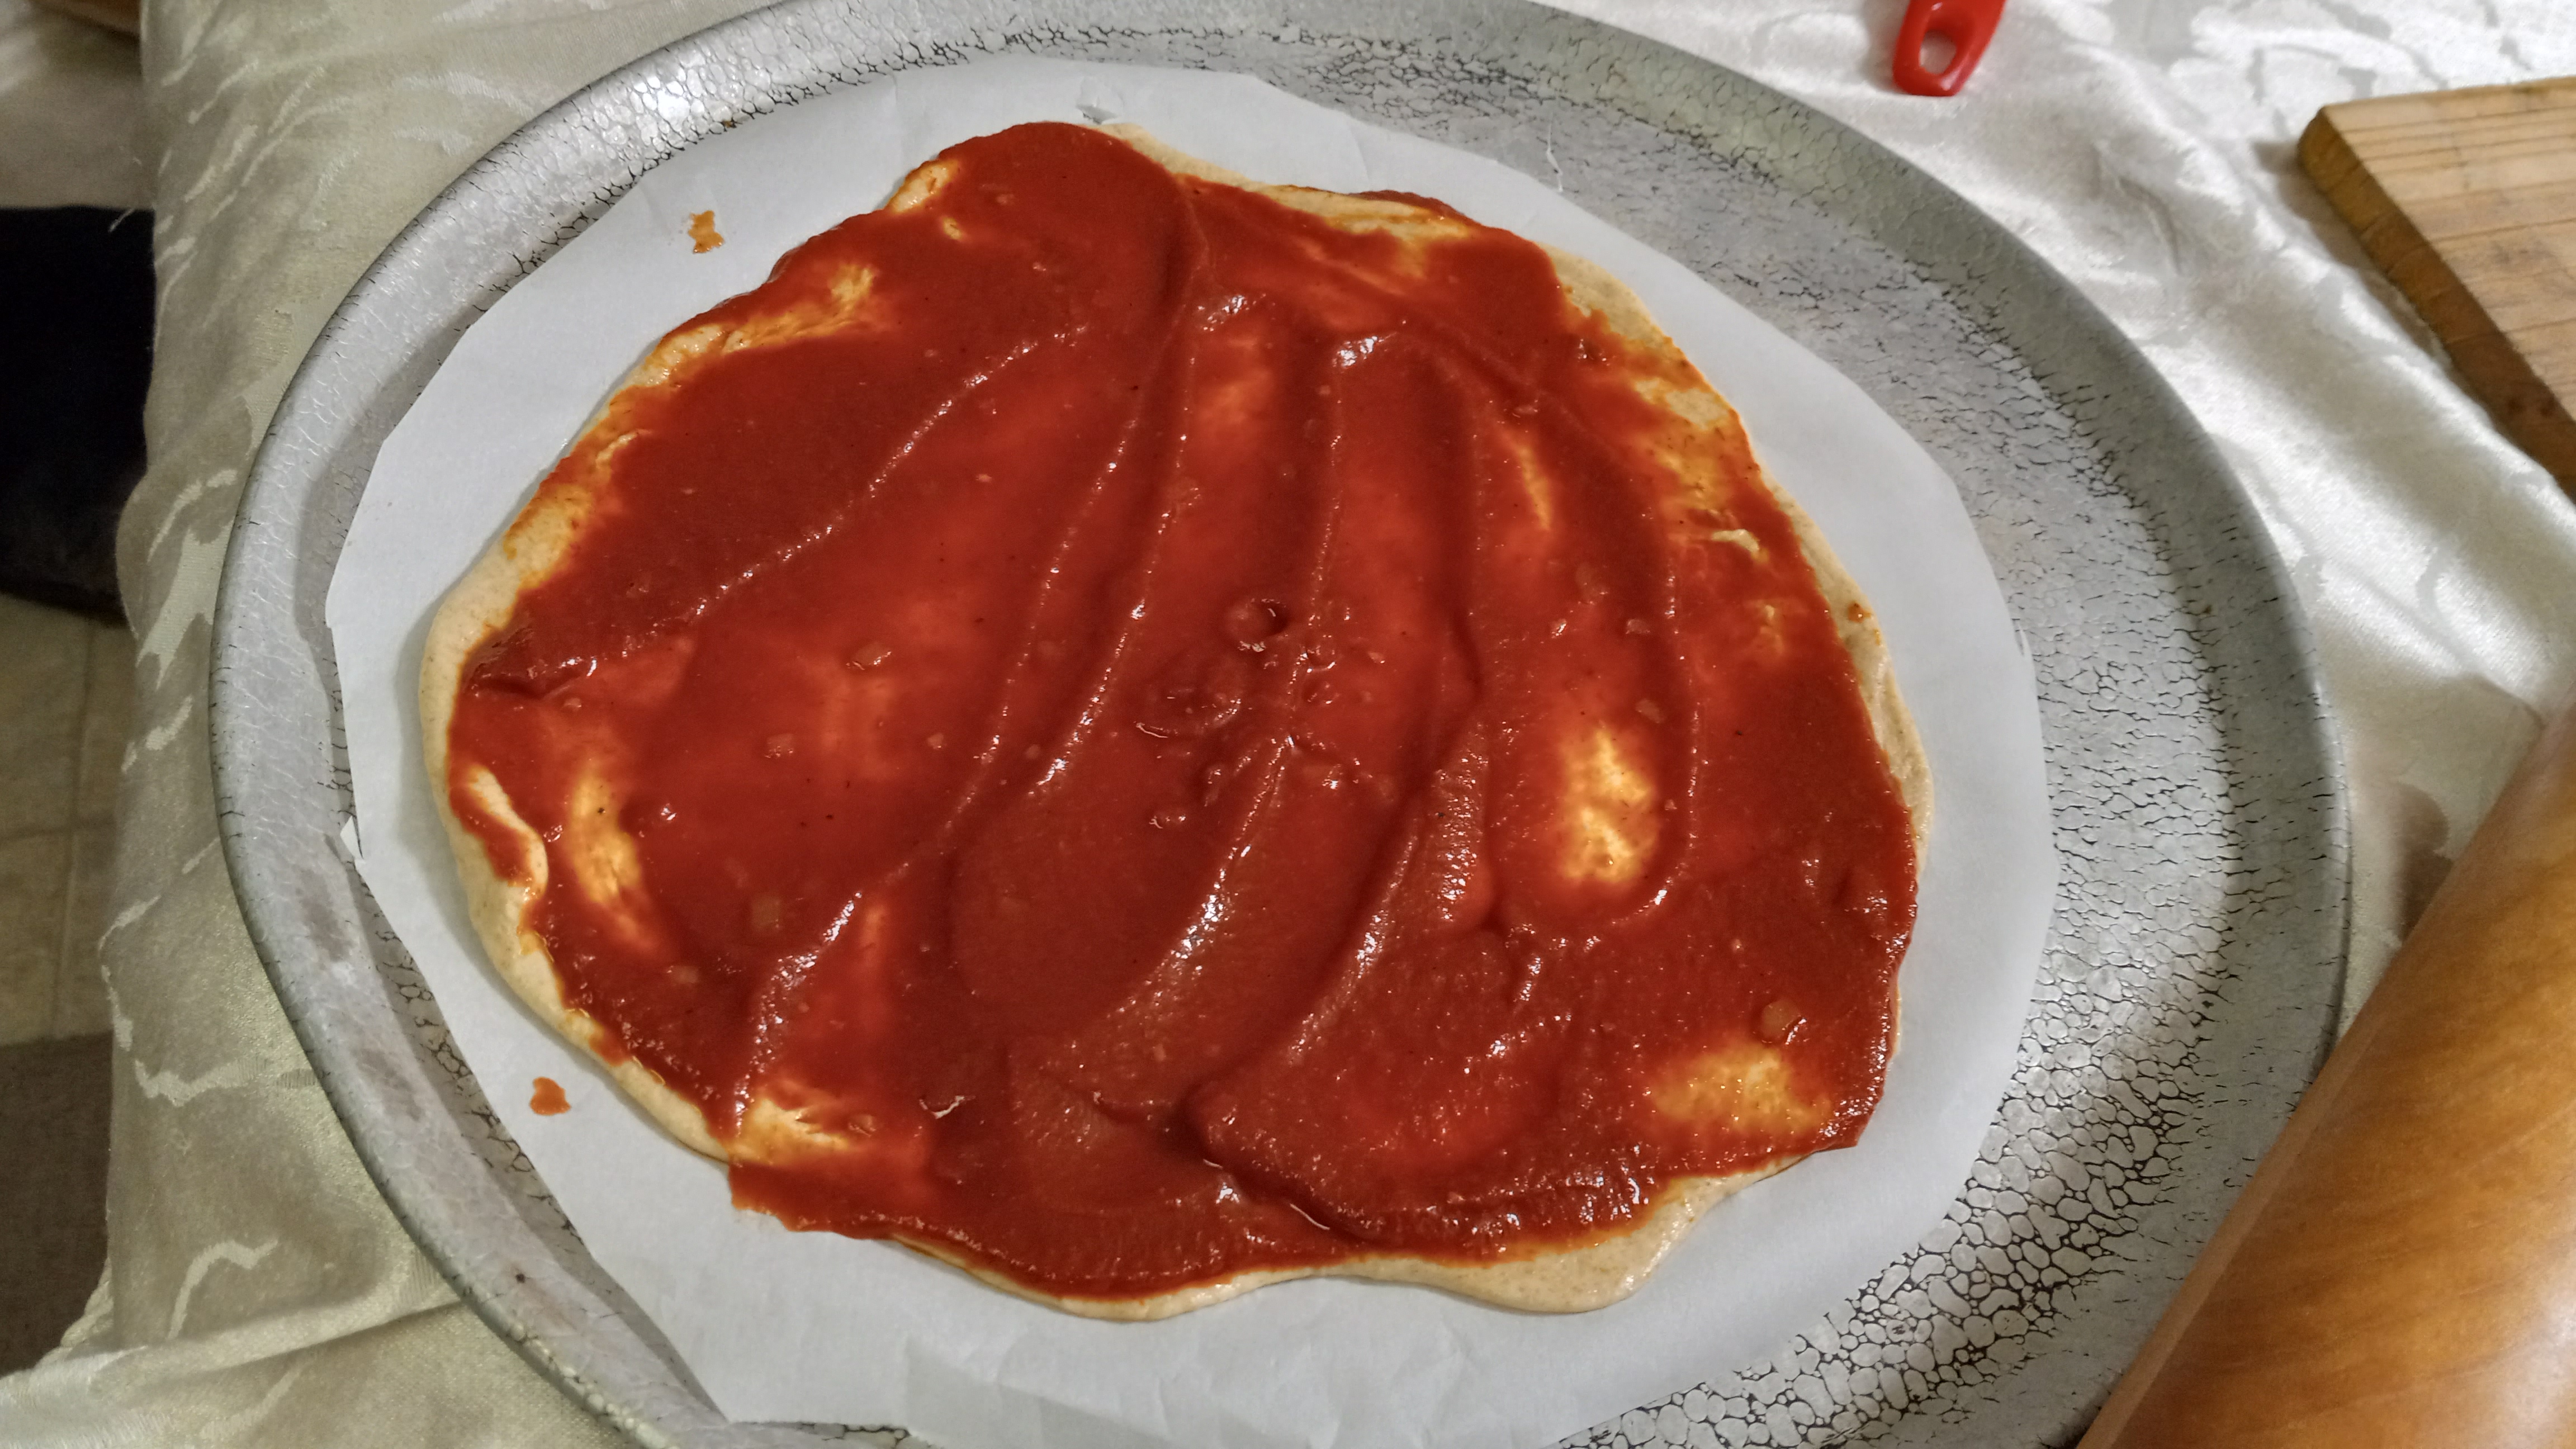
1. Preheat oven 475F. Roll out dough circle approximately 1/4 inch thick (the thinner-the crunchier) on parchment paper, spread the tomato sauce (amounts vary, my son loves saucy so I make almost a quater-inch layer with sauce). For pizza sauce types, it will take figuring out your personal preference. My kids love when I use Ragu Old Fashioned Traditional jar spagetti sauce, no chuncks, no overpowering herb flavor, no guessing if too much salt or sugar (Prego brand is too sweet) but my husband and I prefer little amount of sauce made of a mix of crushed tomatoes with a little tomato paste with fresh basil, oregano, and garlic but carefull not to oversalt. Spead your toppings (but not cheese yet).
*If your parchment paper roll only had 3 inches left, you can use foil but make sure to lift the crust and separate from foil slightly without tearing before spreading the sauce. No foil? Spread cormeal or some crisco or oil on pizza pan
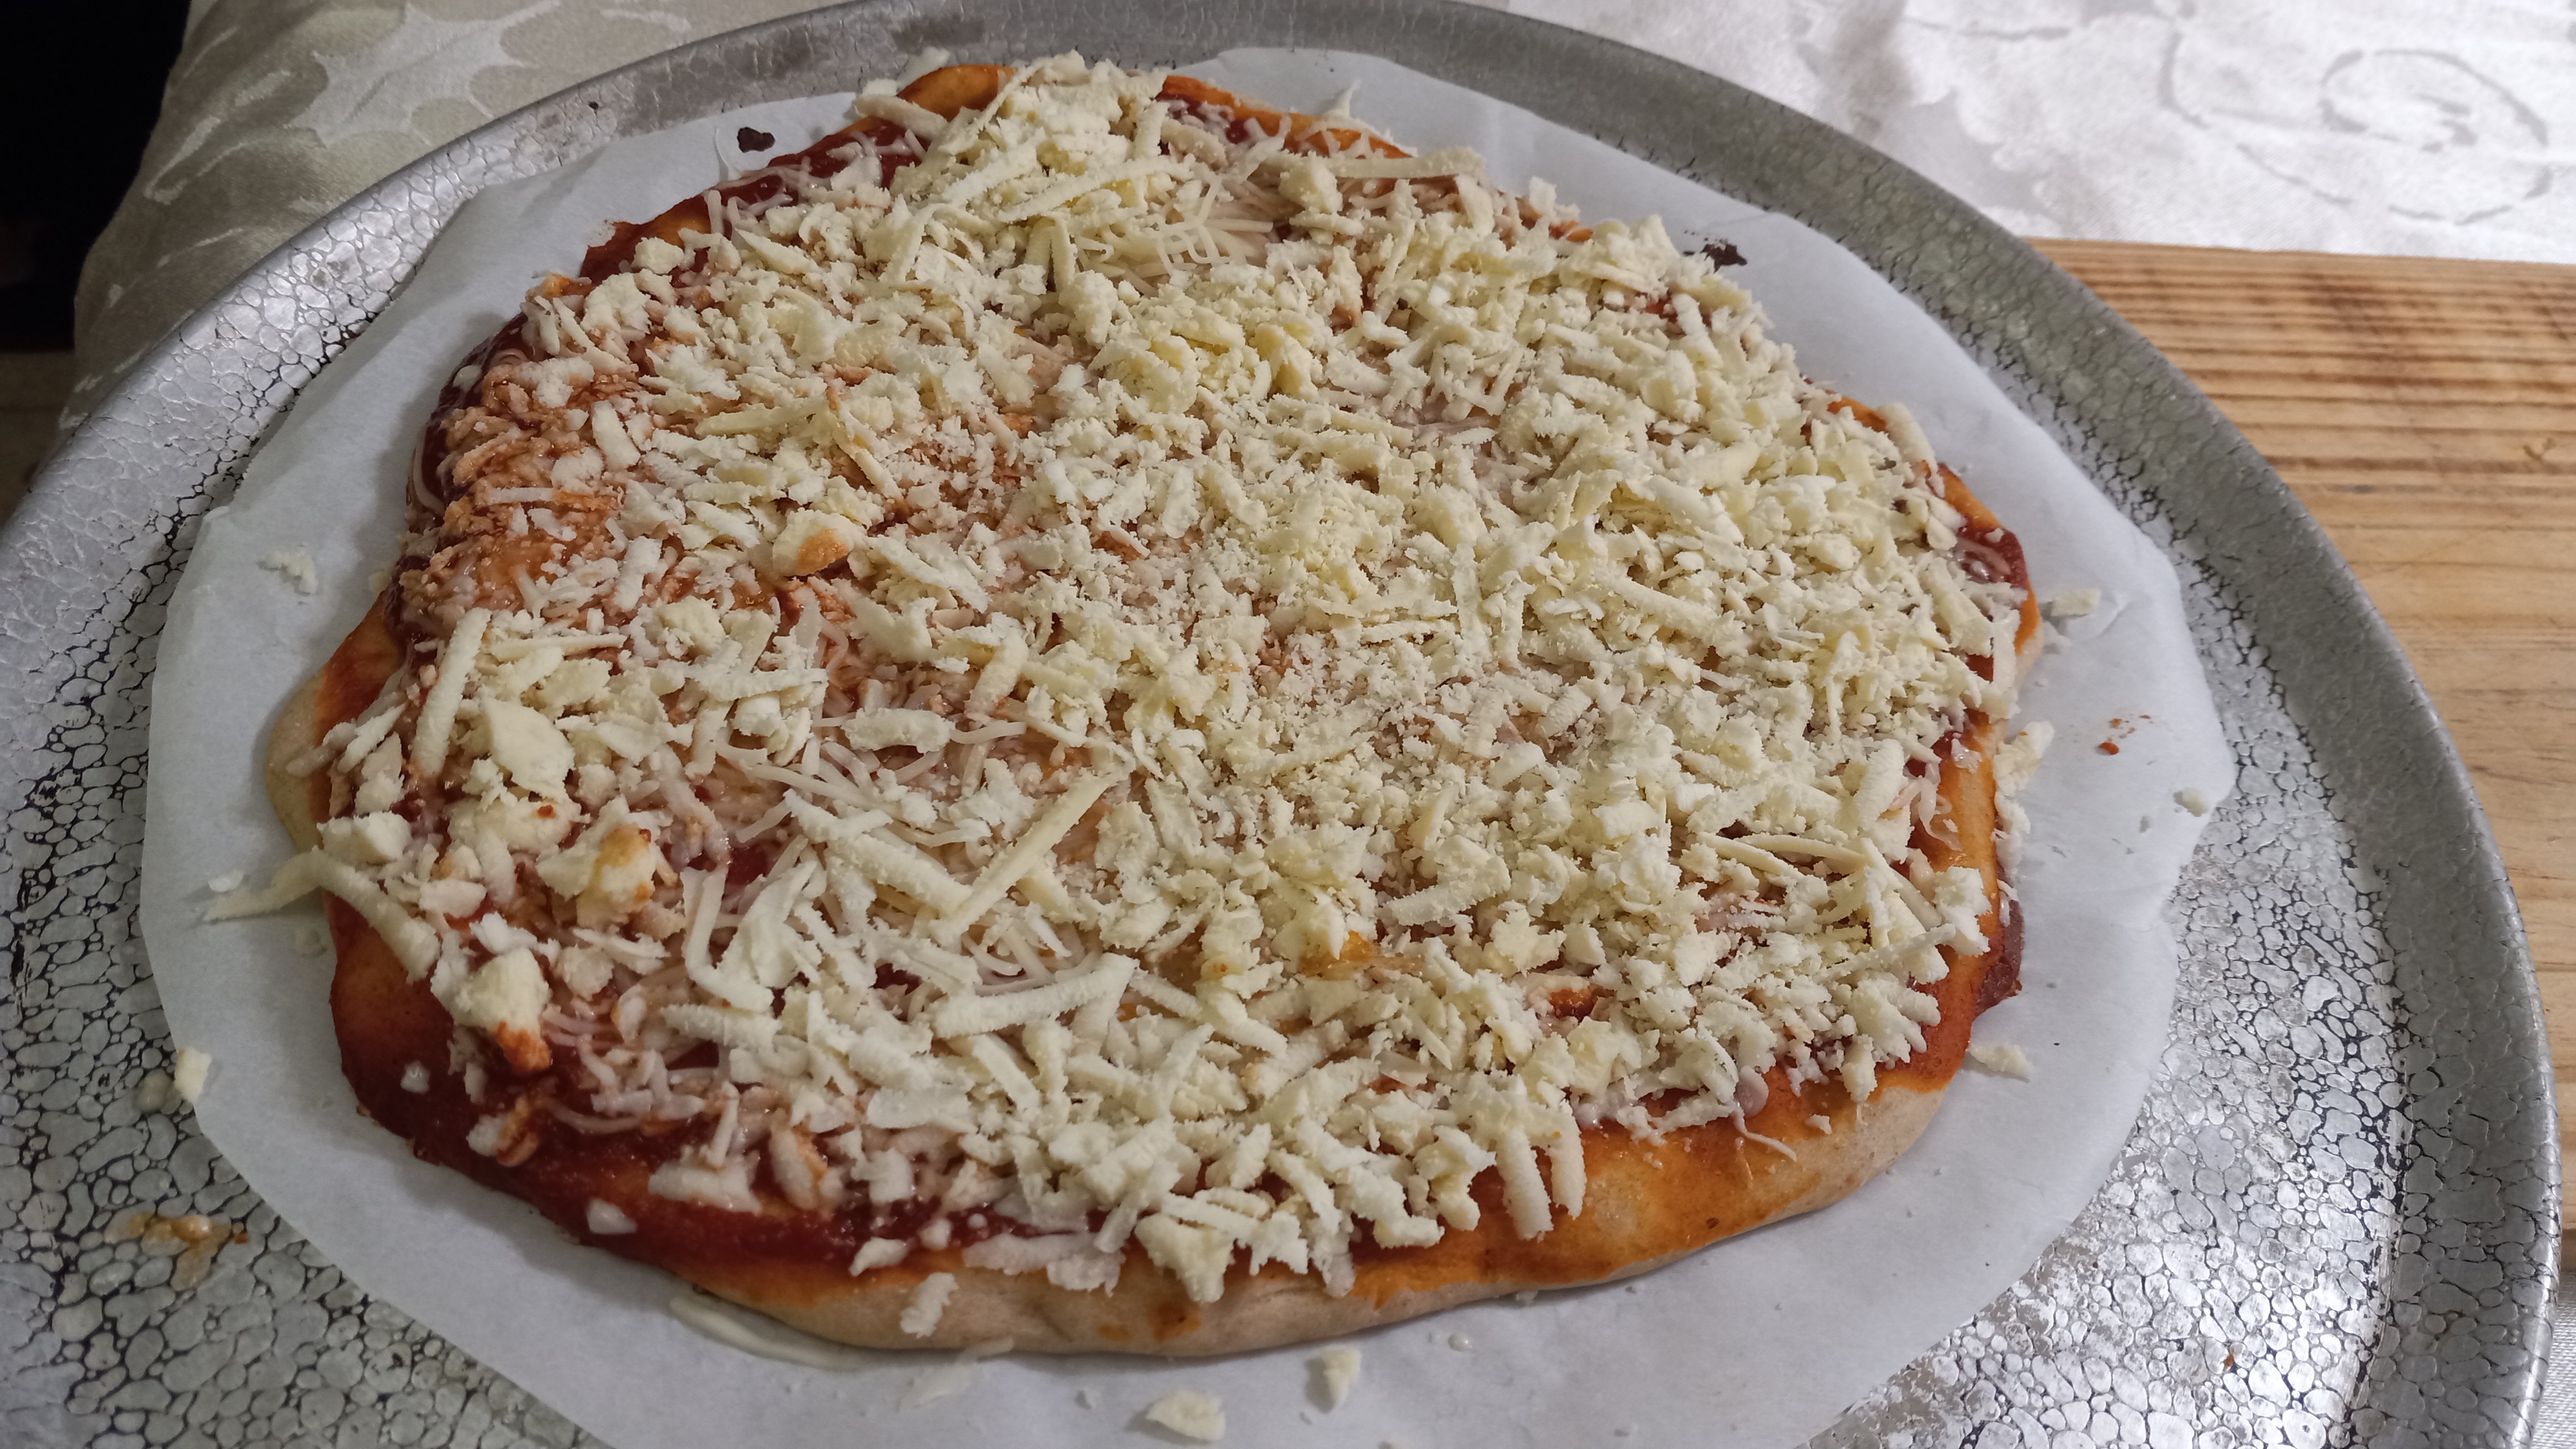
2. Put in the oven mid-level for 6-7 minutes. Shred your cheese meanwhile.
3. Take almost-done crust with sauce out of the oven and quickly spread freshly shredded mozarella with provolone (80/20 ratio) or store-bought preshredded Kraft italian style cheese mix.
*(Sometimes I may add a small amount of freshly shredded sharp white cheddar about 3-5 percent ratio to add a tiny EH! with little sharp salty flavor and much drier consistency so it melts slower while baking and the shreds are more countoured almost as if intact)
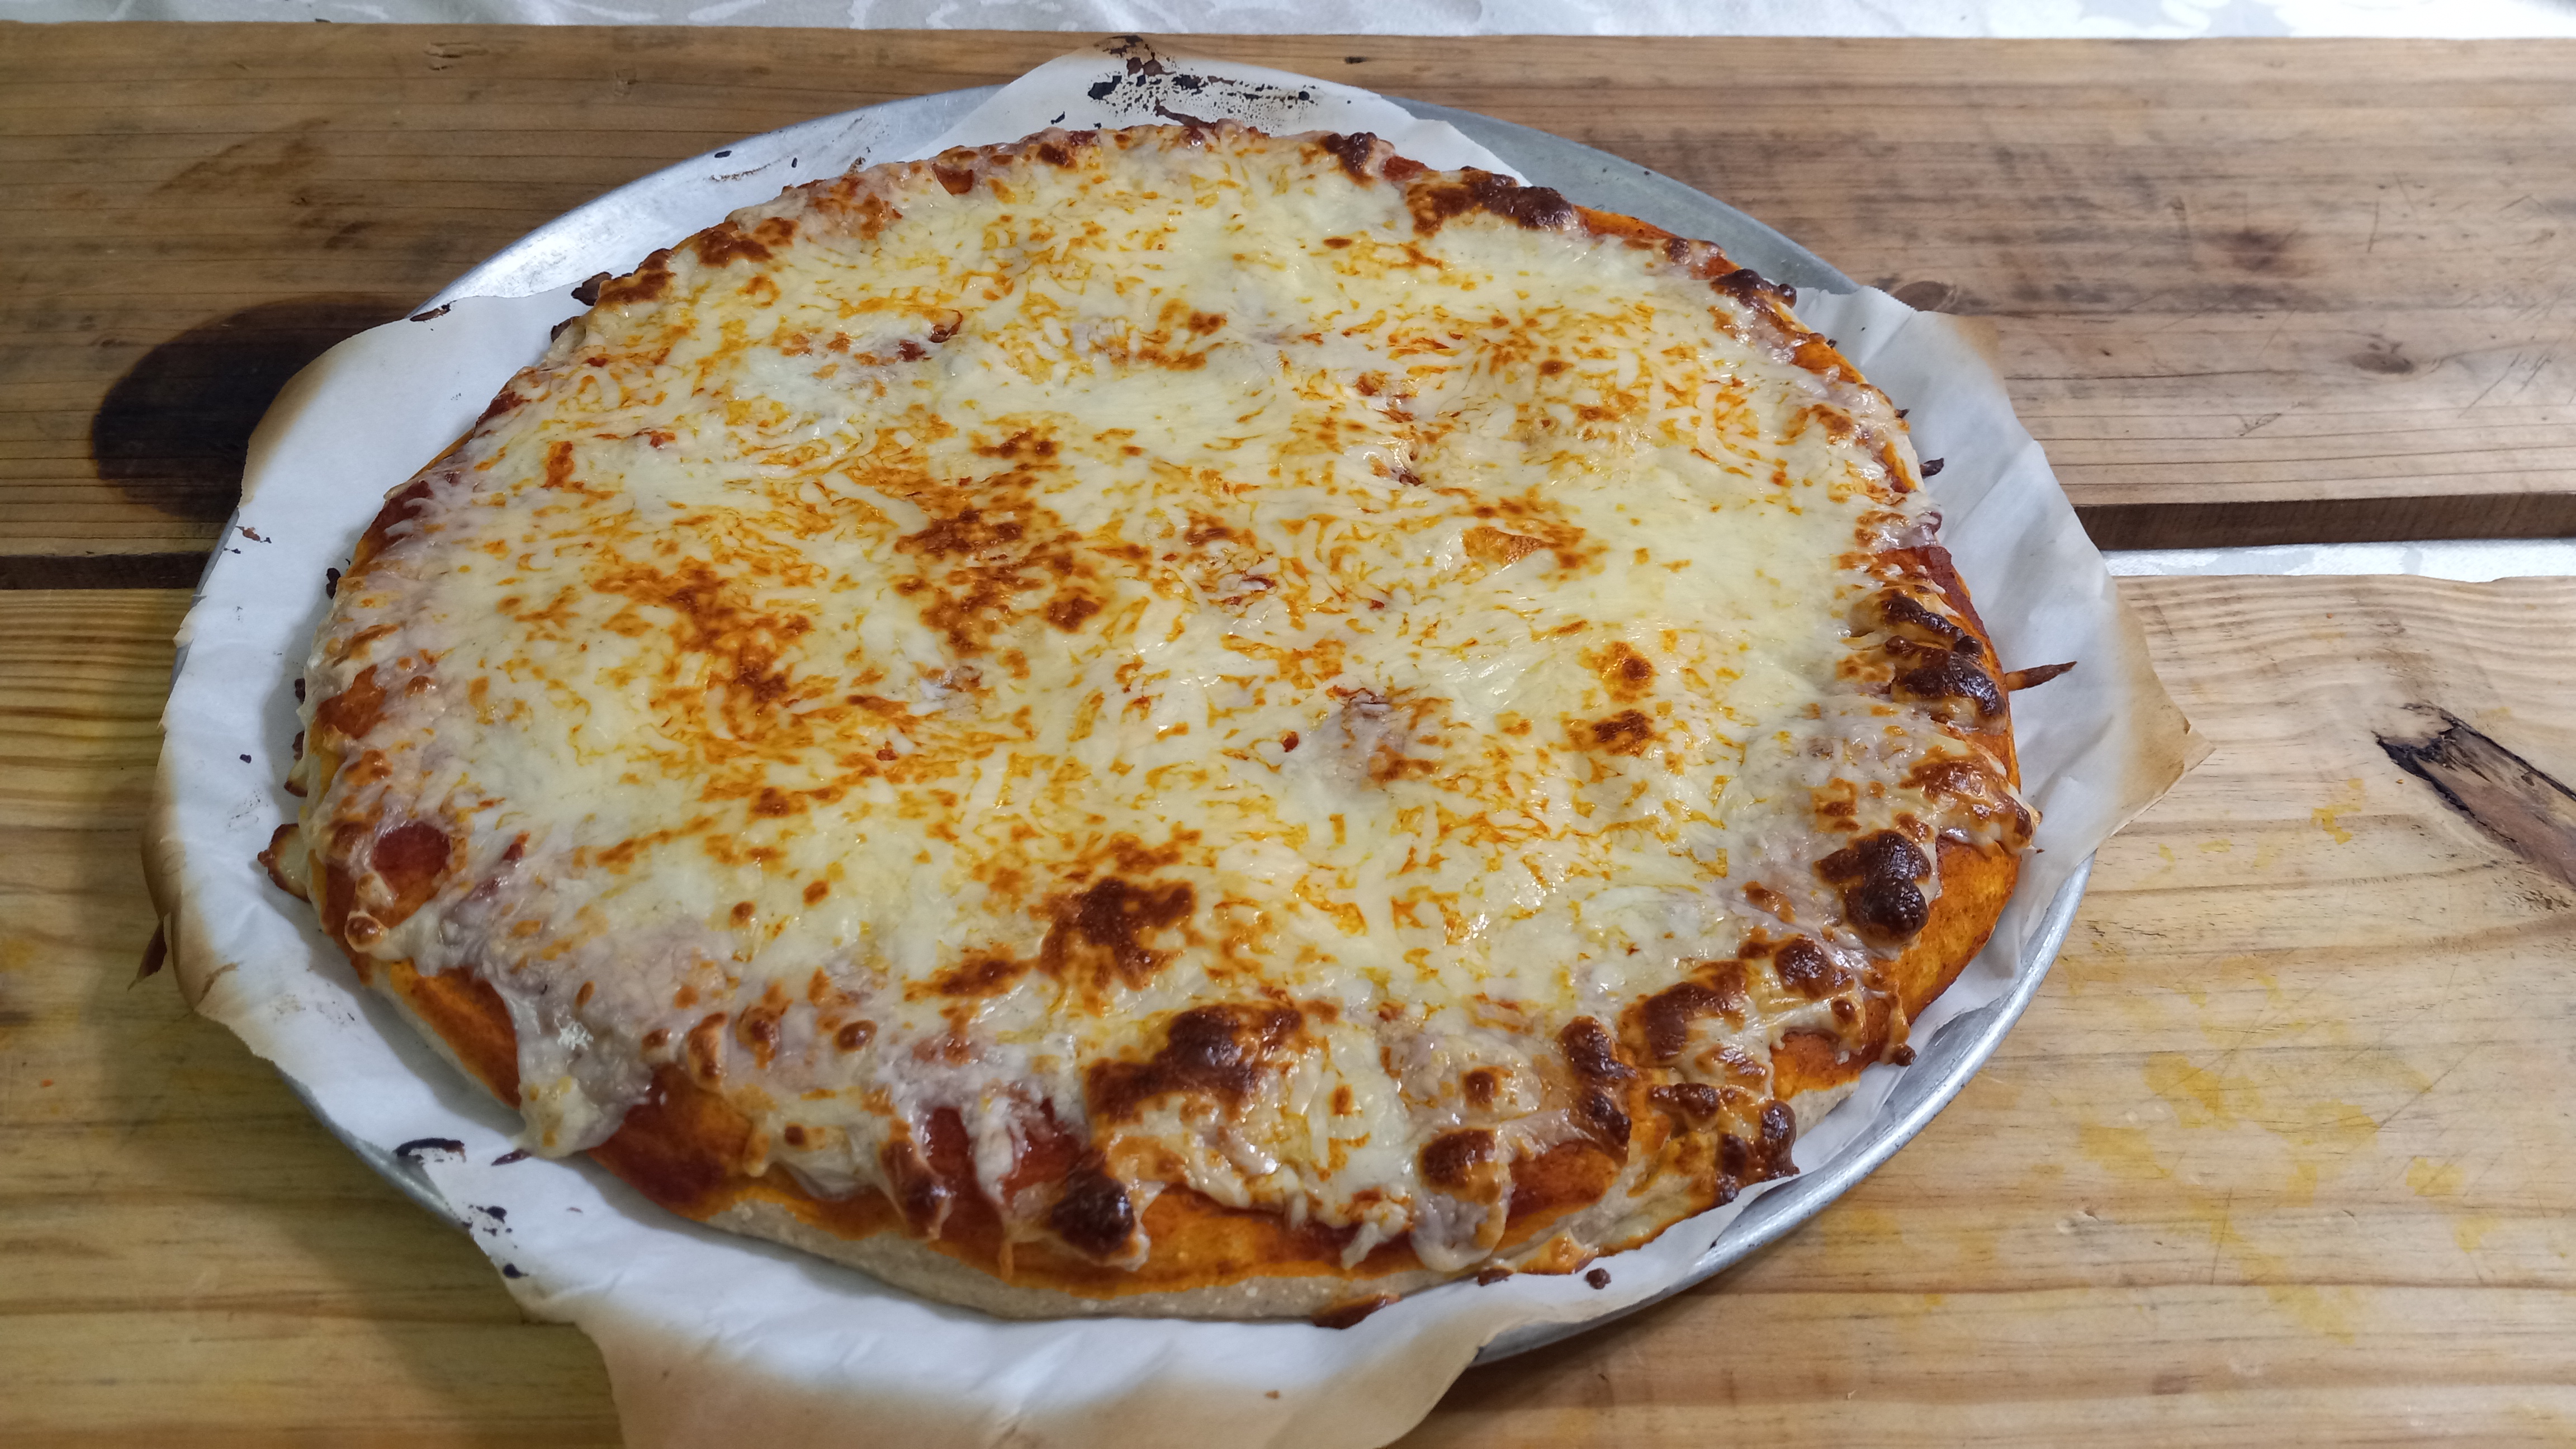
4. Put back in the oven for 1-3 more minutes, but watch through oven door glass the entire time as the cheese melts. Turn broil on and watch till desired brown top is achieved (30 seconds to 1 minute).
*Do not go over 9 minutes for the entire bake time or the crust bottom will be too dark to eat. You could bake at lower temperatures such as 375-425F, but the longer bake time will cause crust taste more like a thin slice of bread. Adding cheese at the end and returning it back into oven to finish baking ensures the crust is well done without any raw spots and any guess work which white cheese burns faster (like mozarella). It also helps cook out moisture from the sauce without leaving wet "gluey" layer between crust and sauce.
5. Cut and serve immediately with fresh basil leaves and warm tomato sauce or garlic butter for dip.
*NEVER use Marinara sauce, its complex sweet bittery flavor causes many beginner pizza bakers much disappointment.
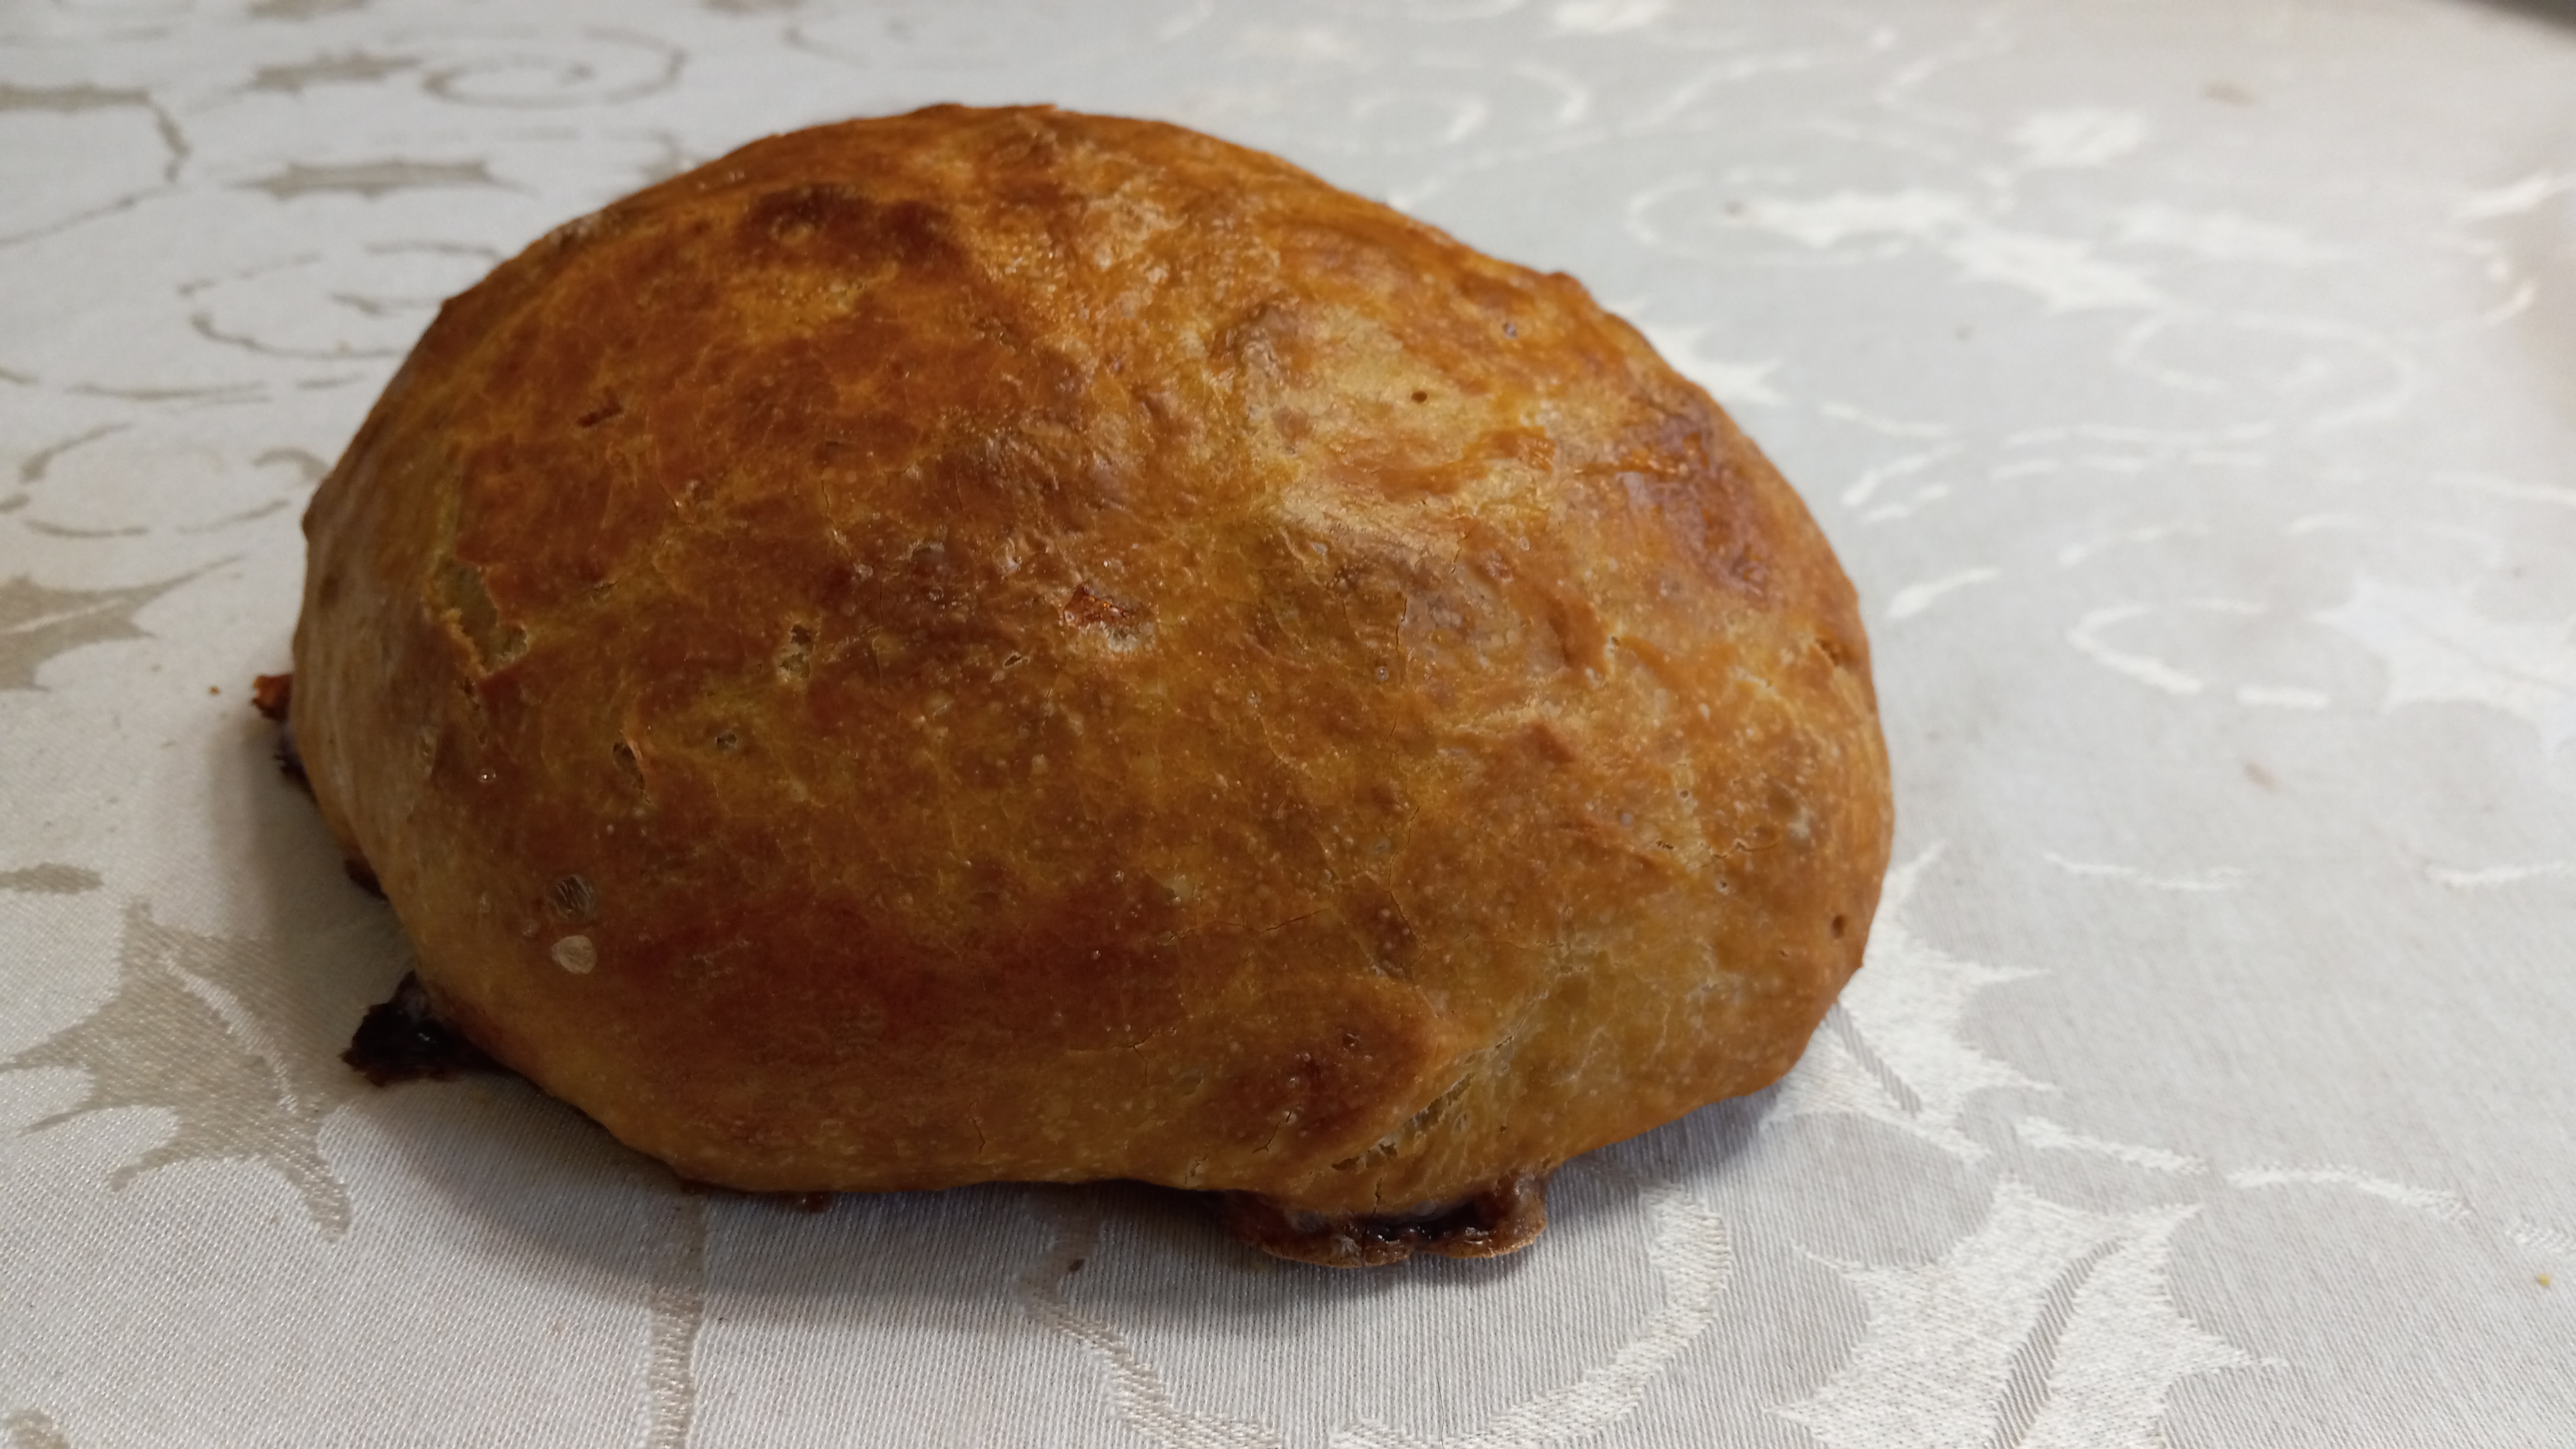
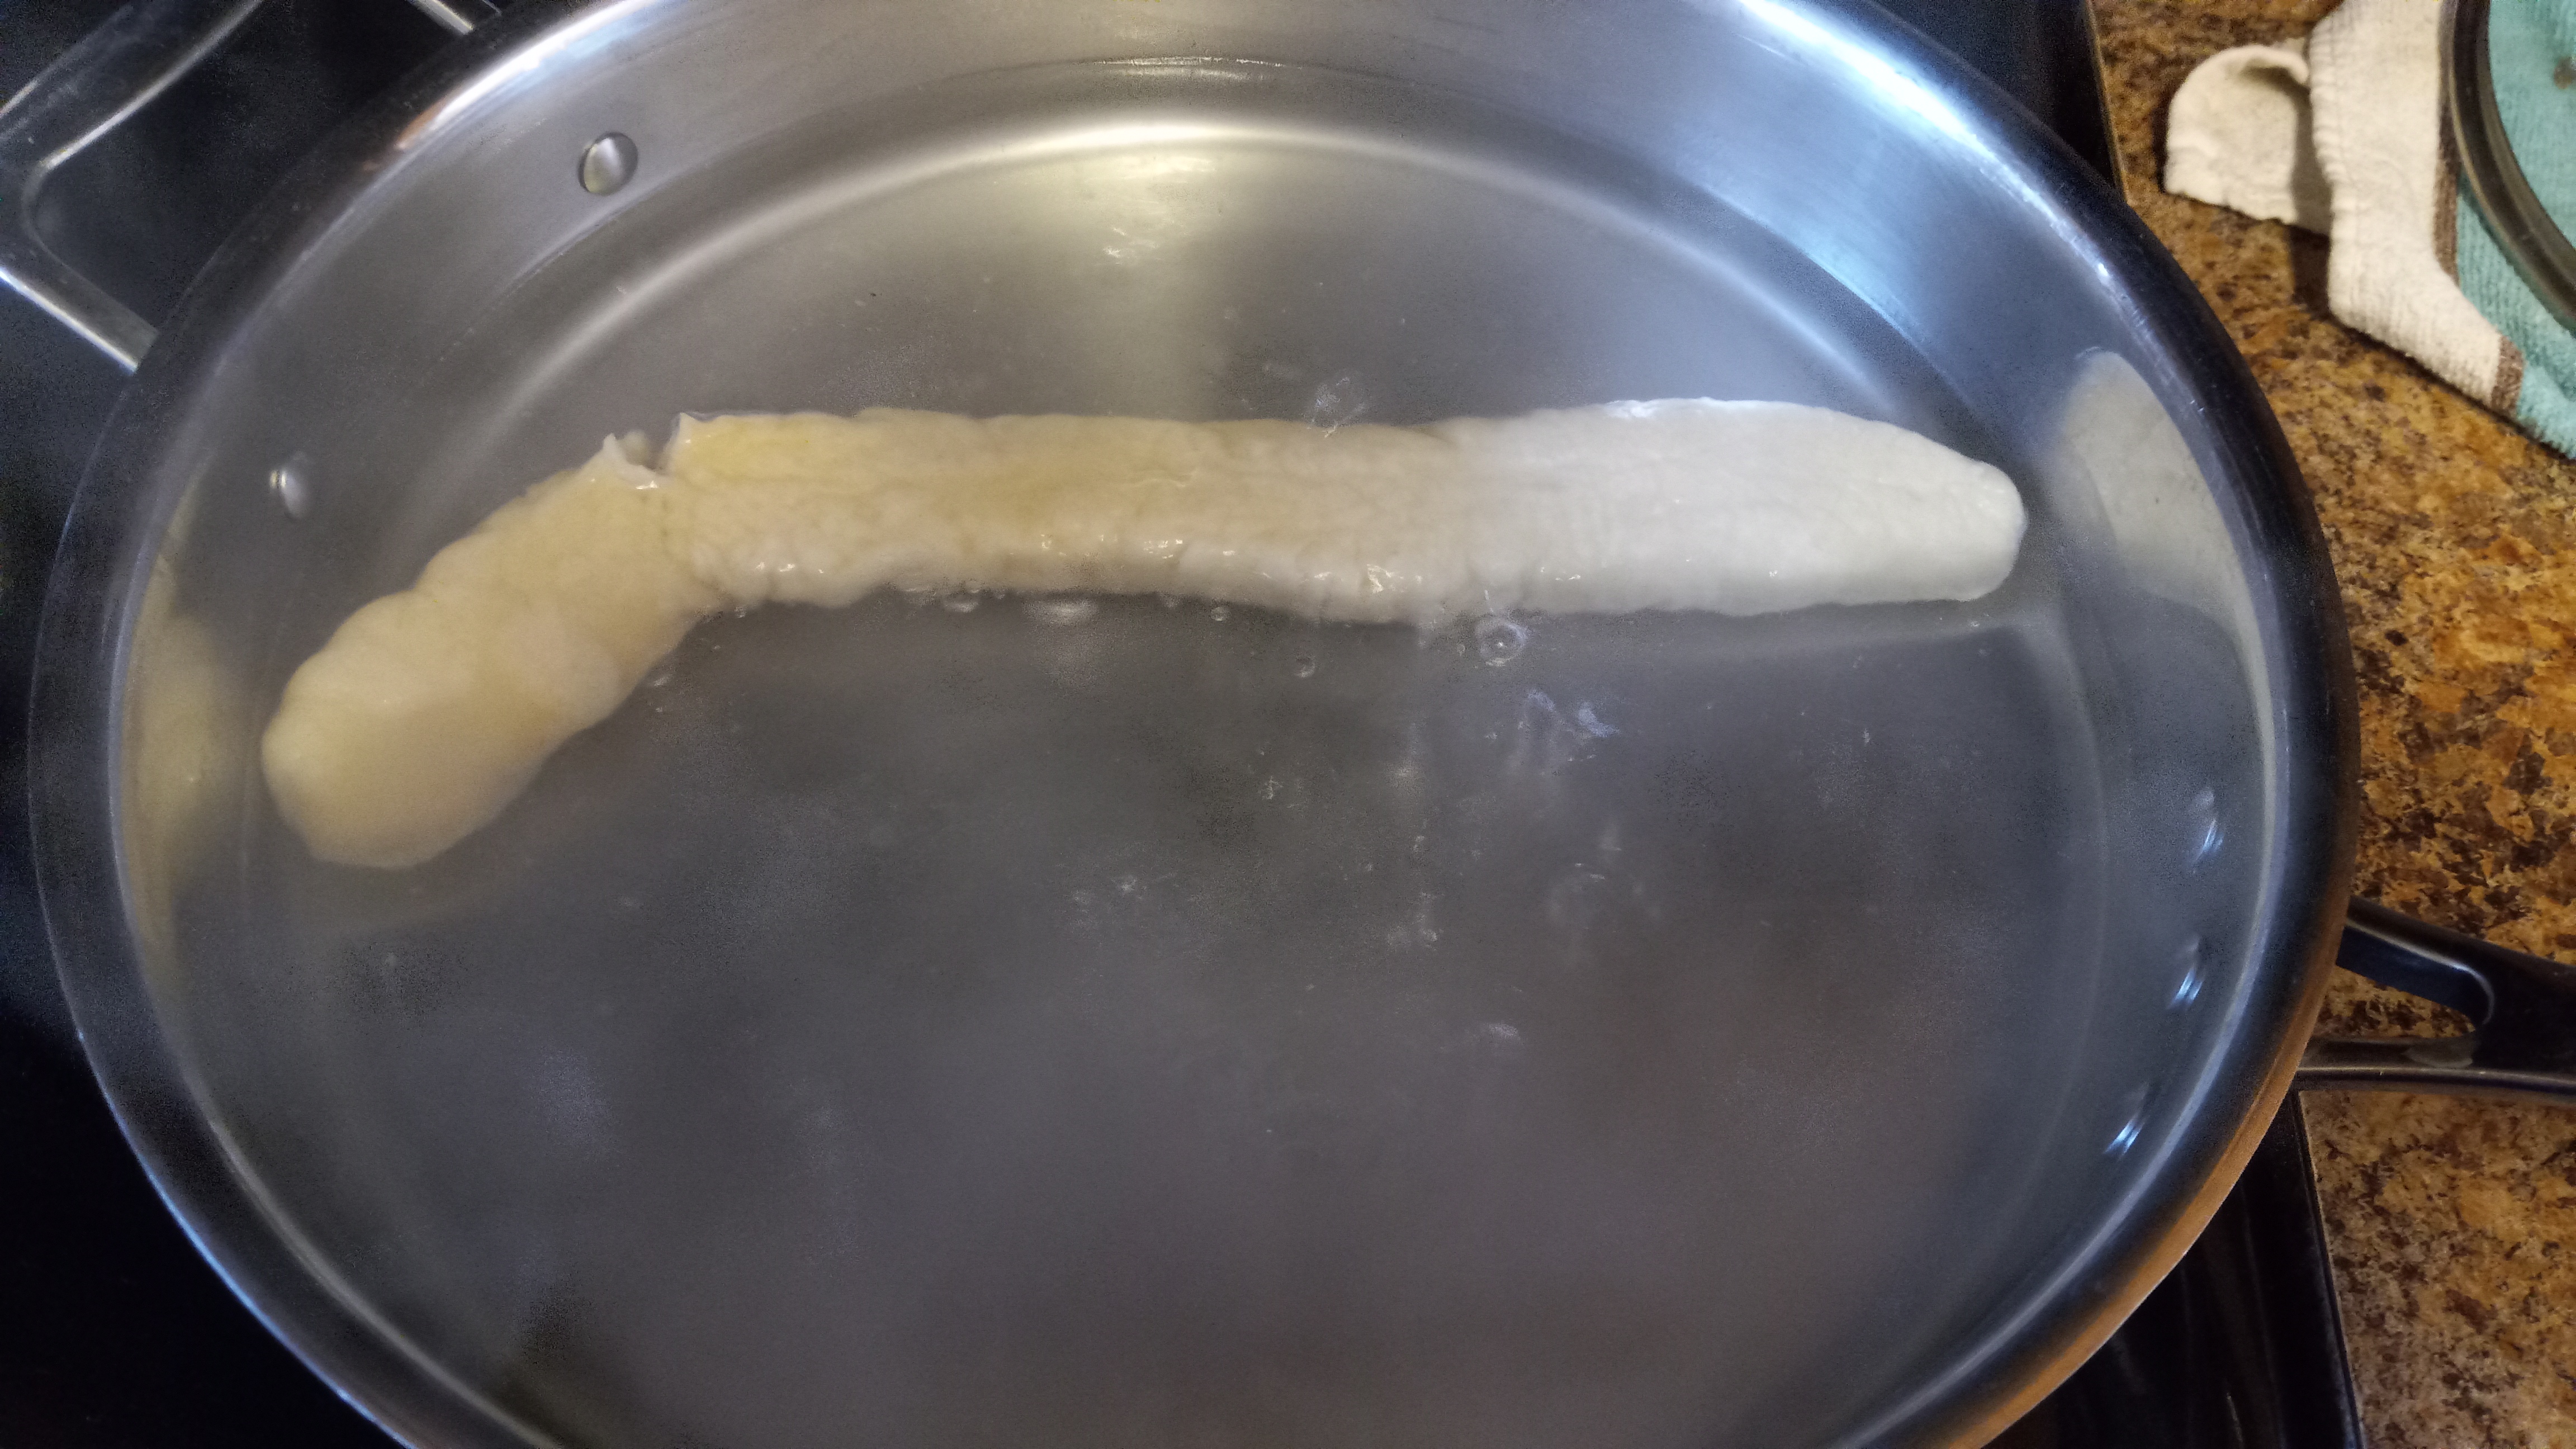
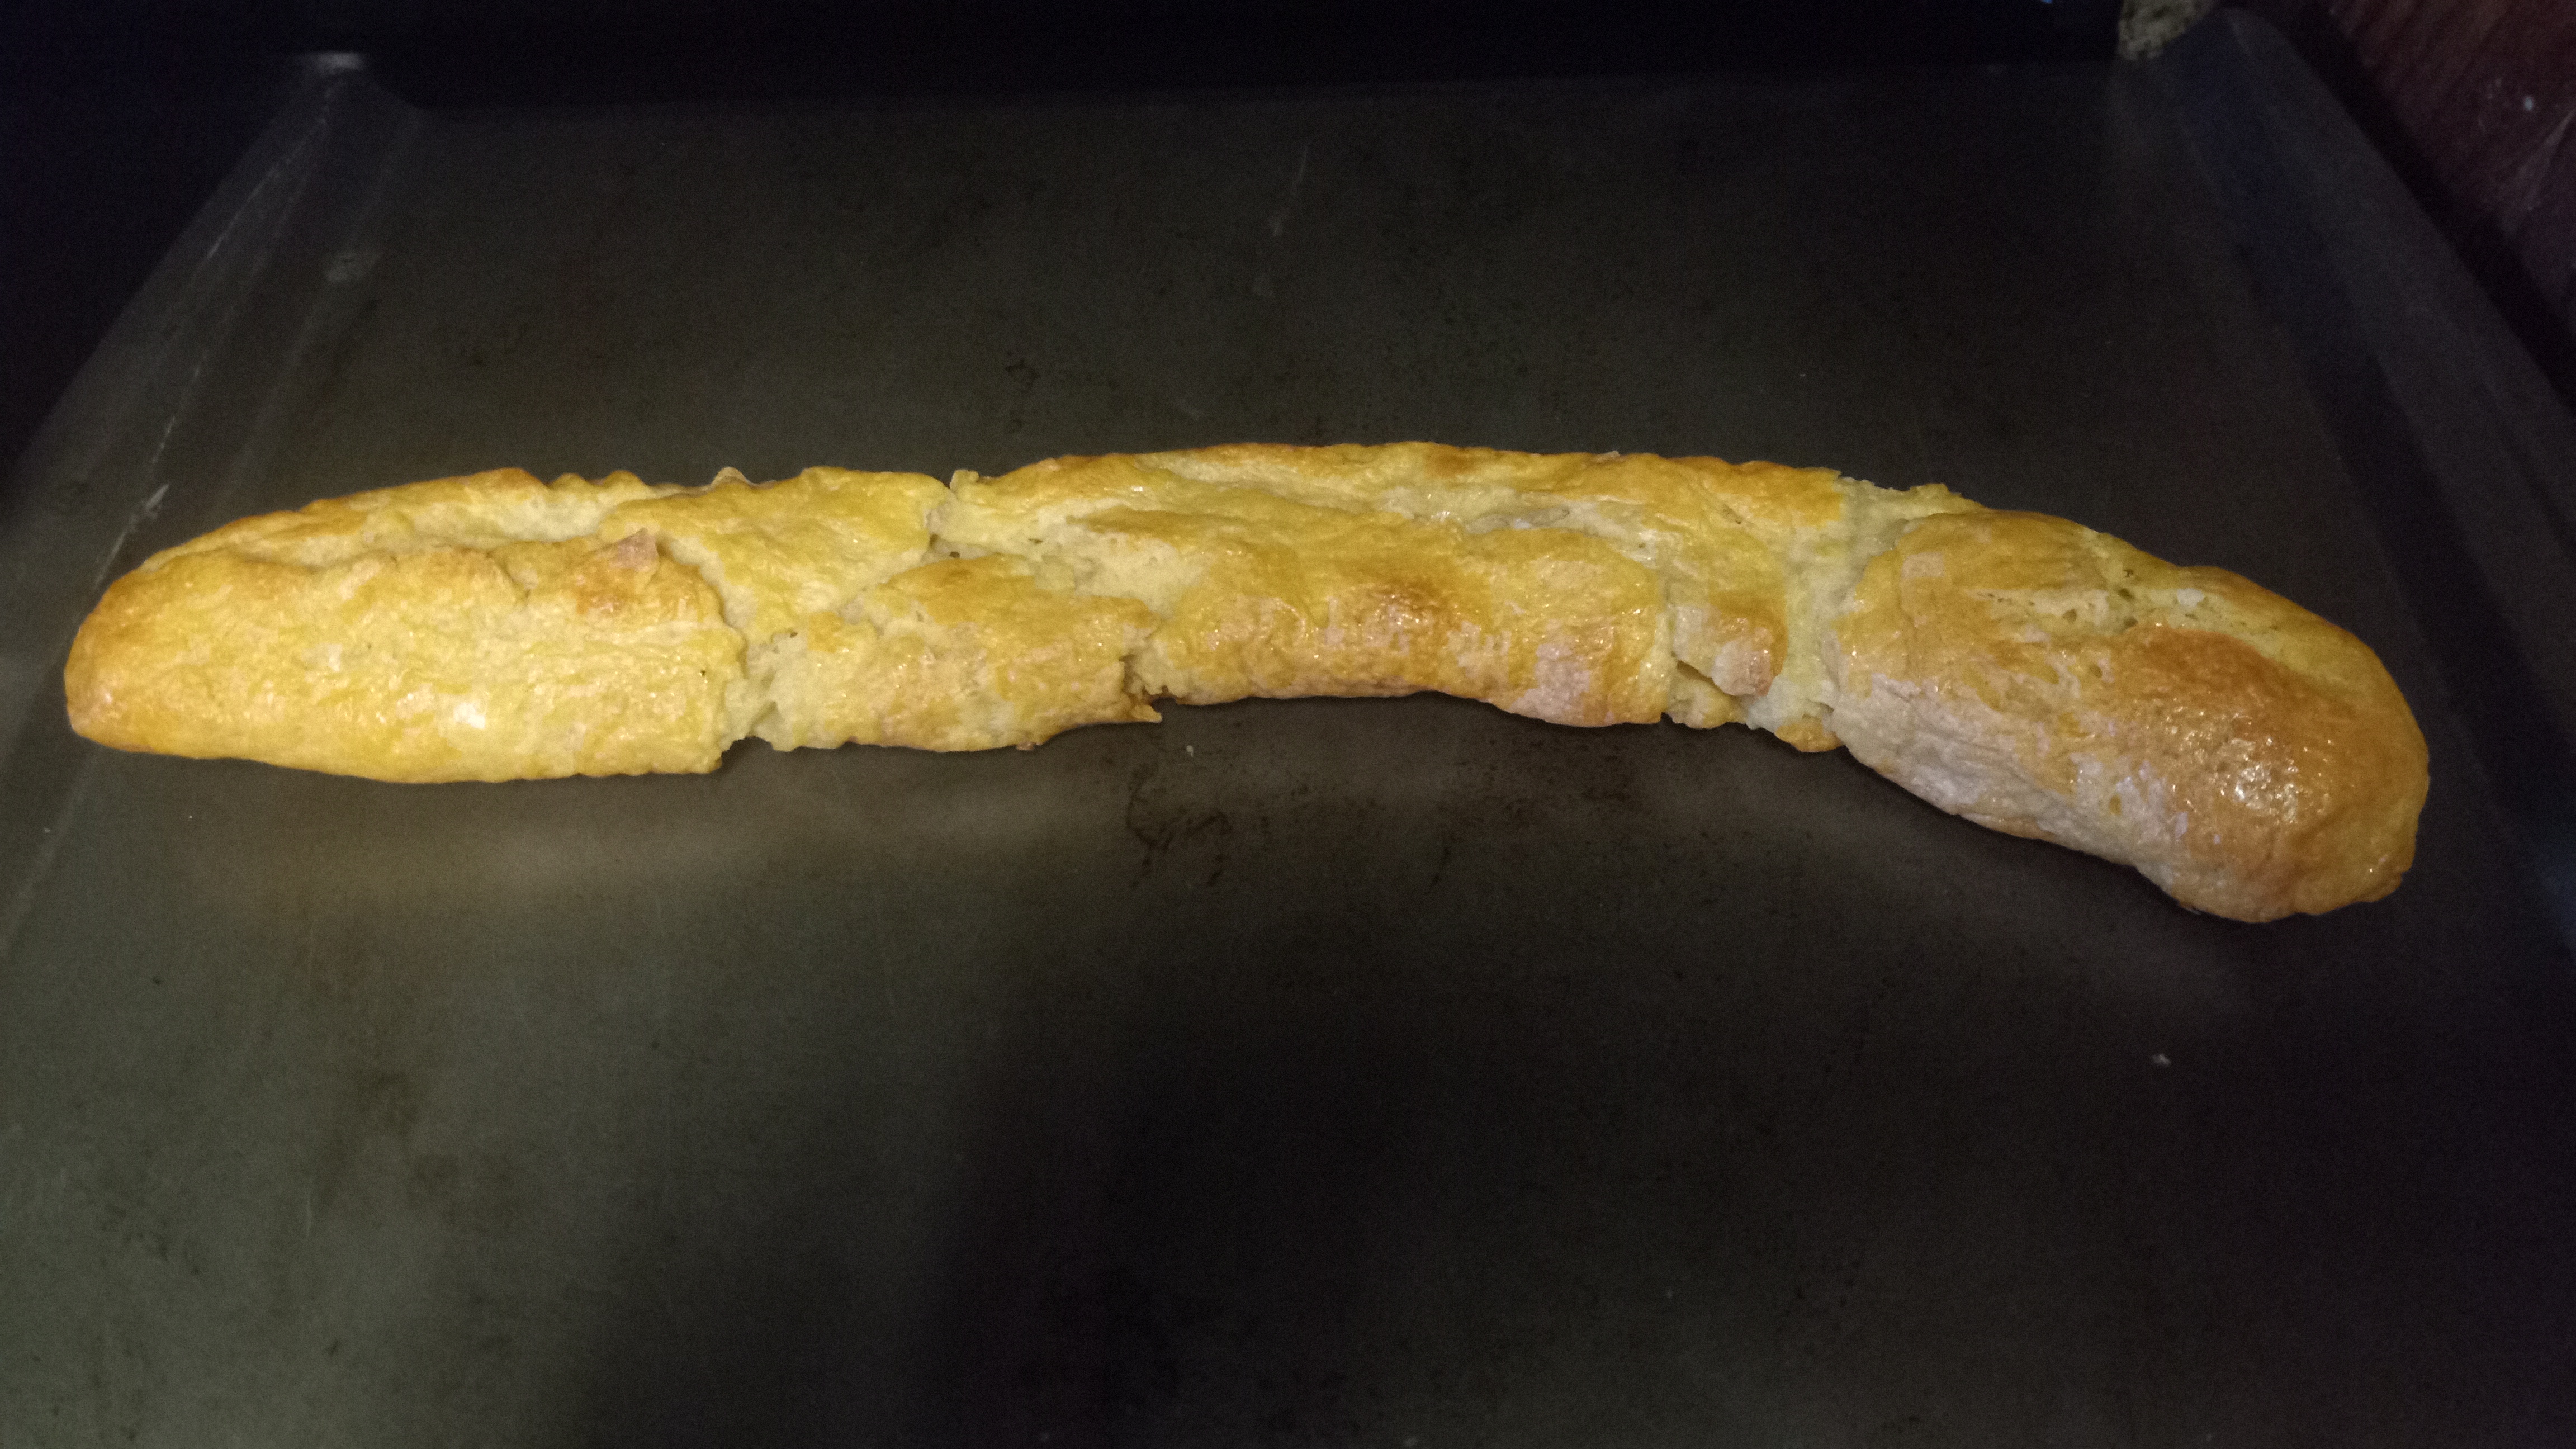
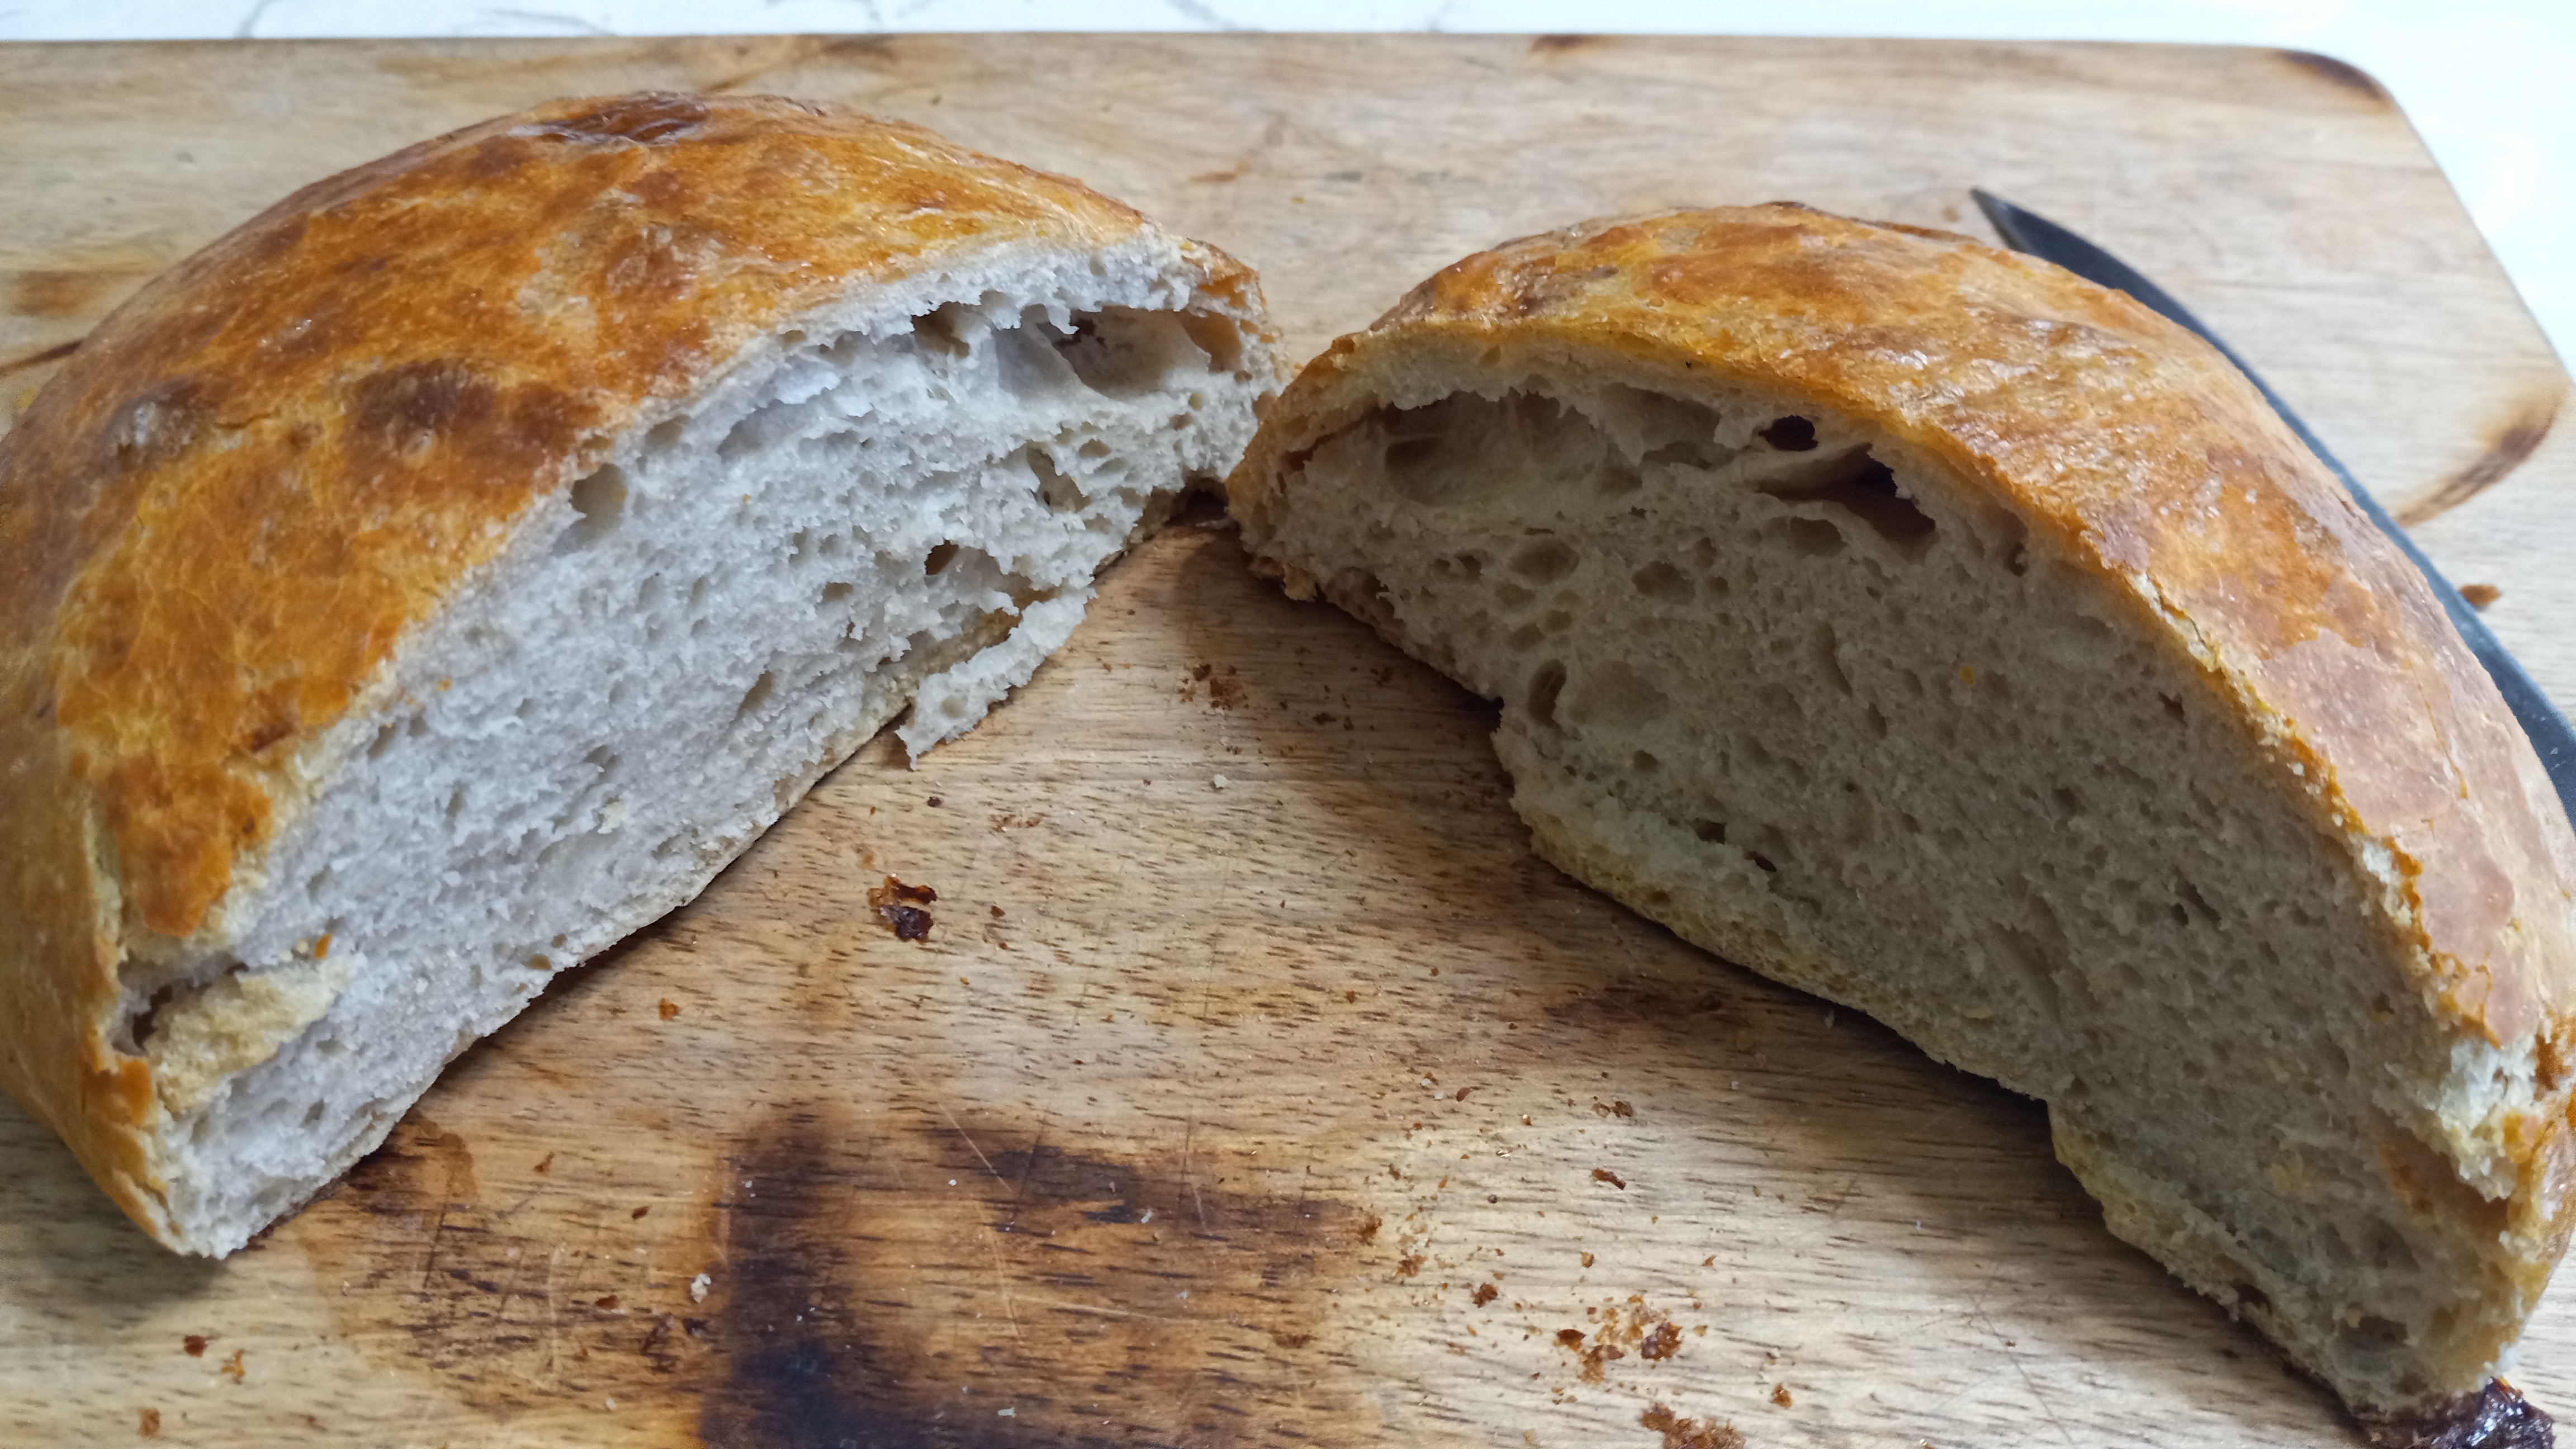
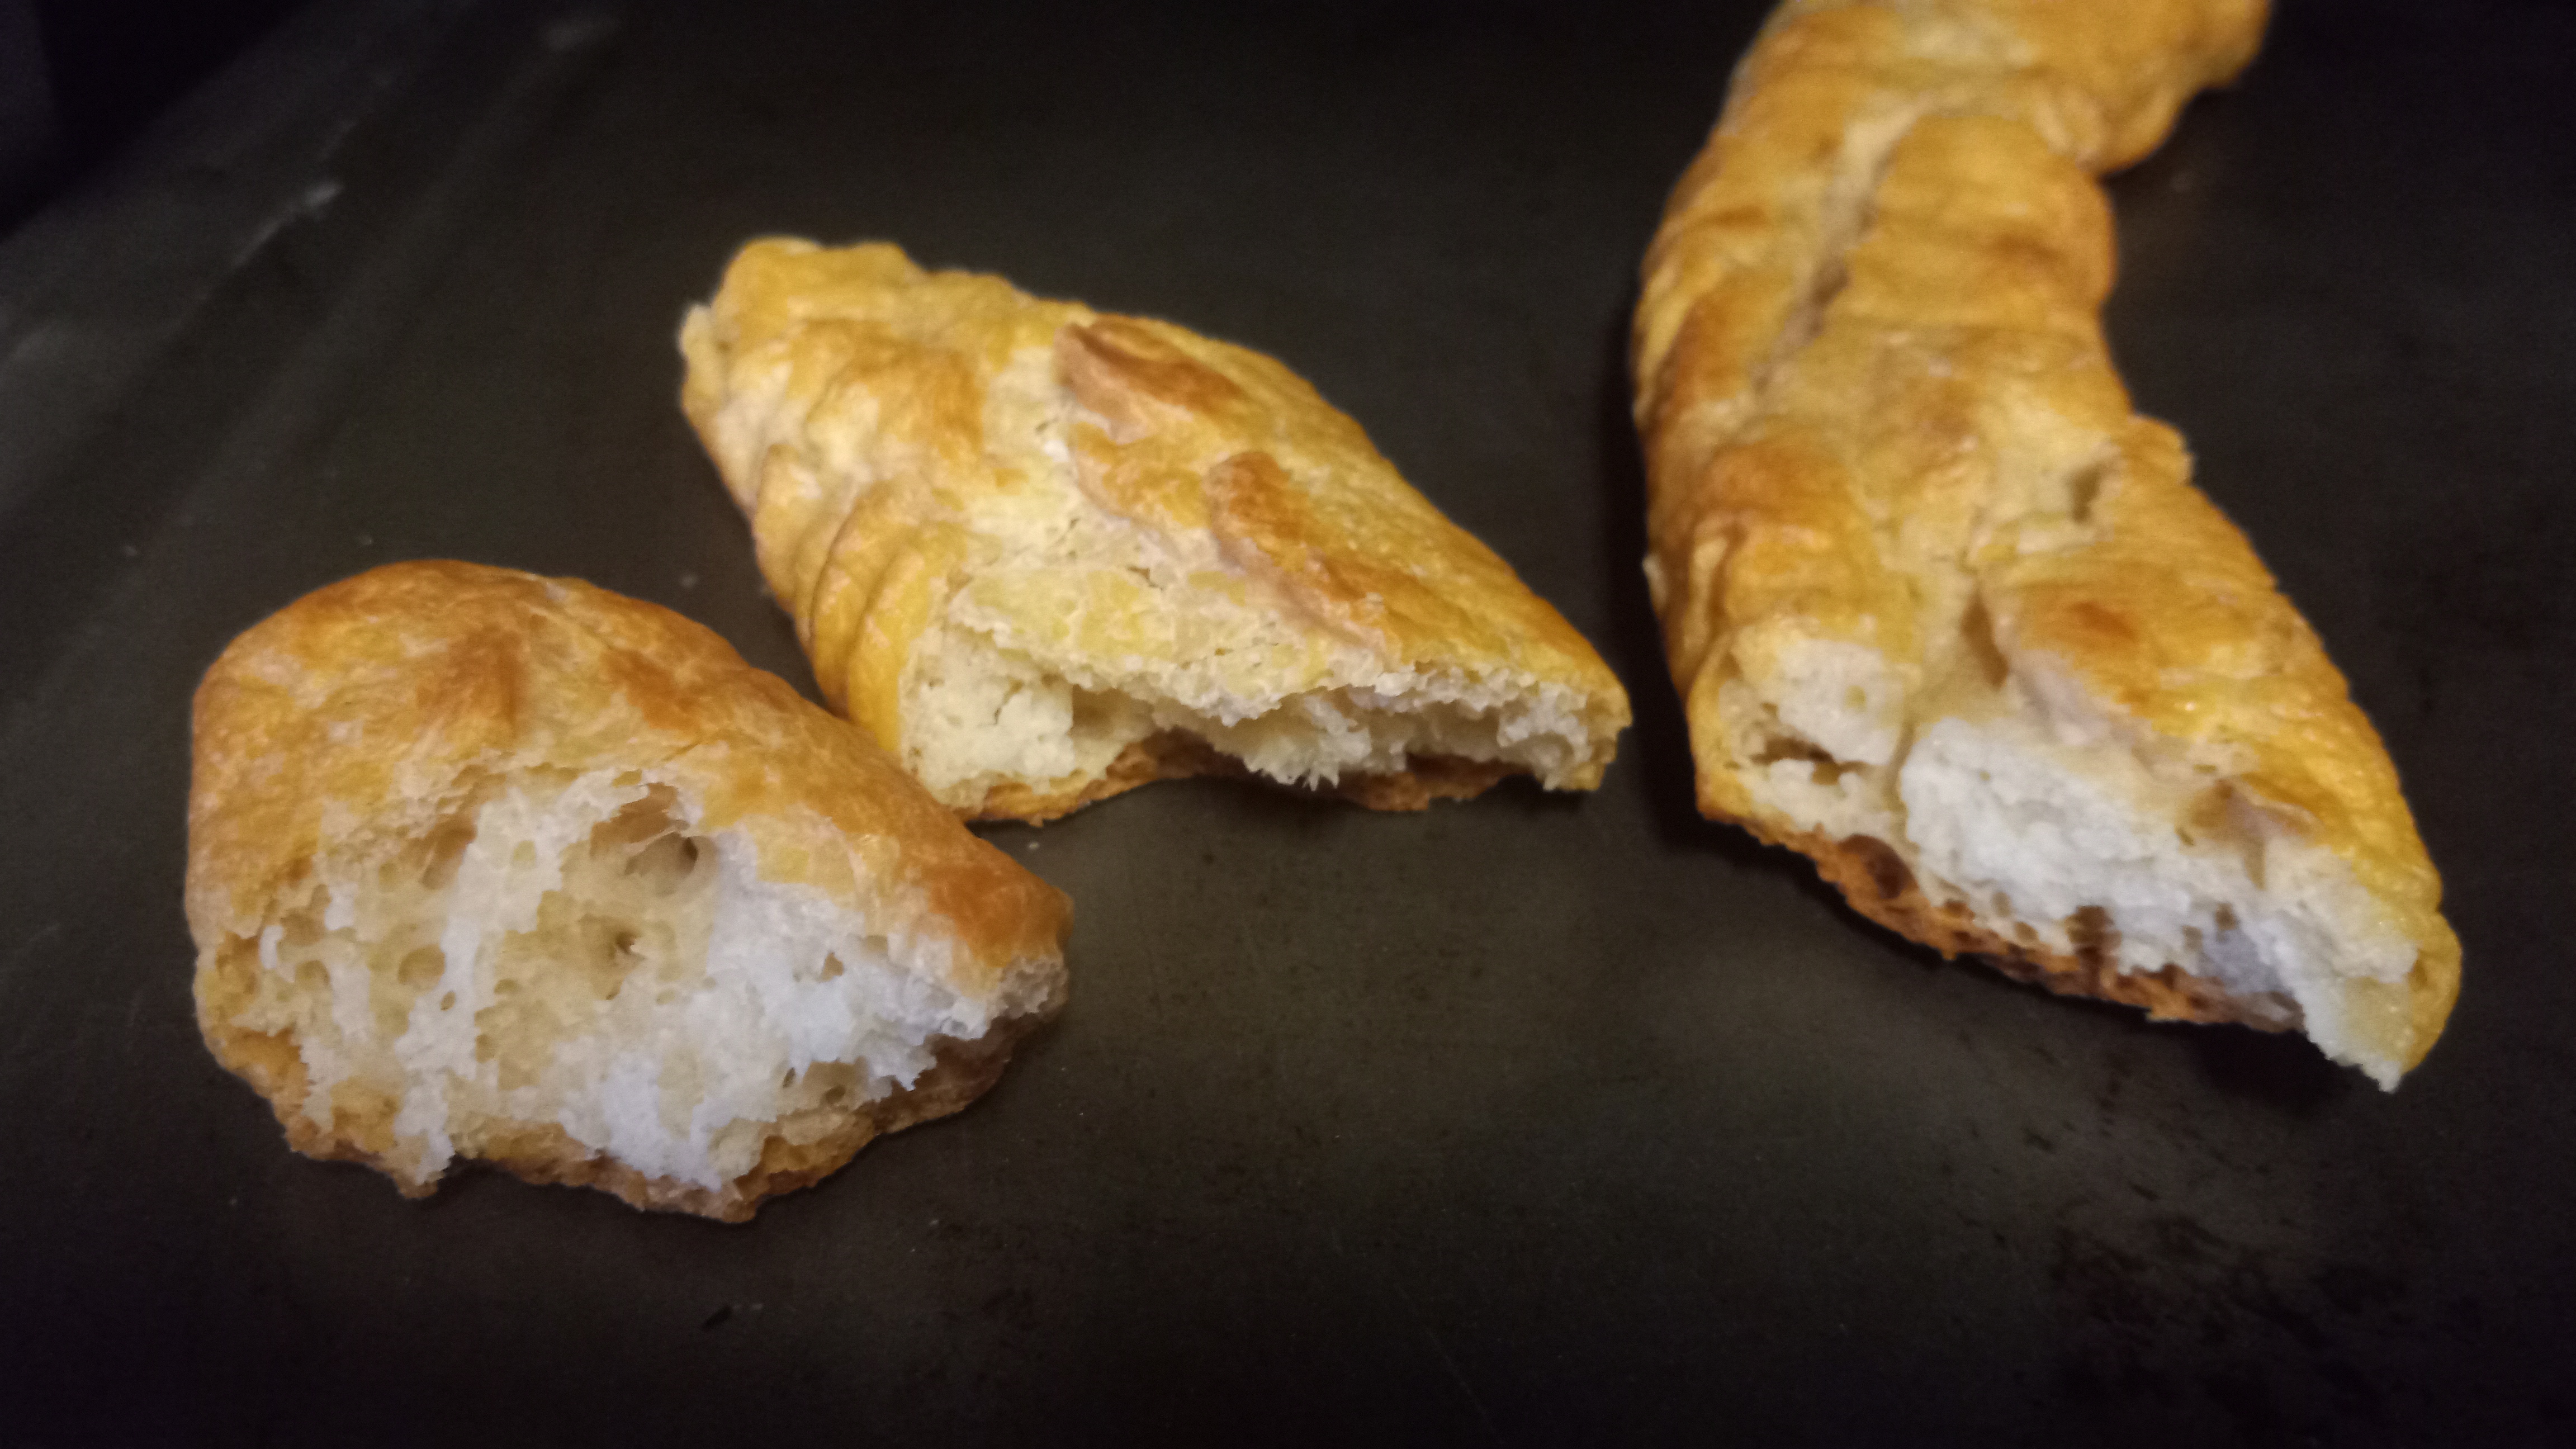
FOR BOILED BREAD ROLLS BREADSTICKS*:
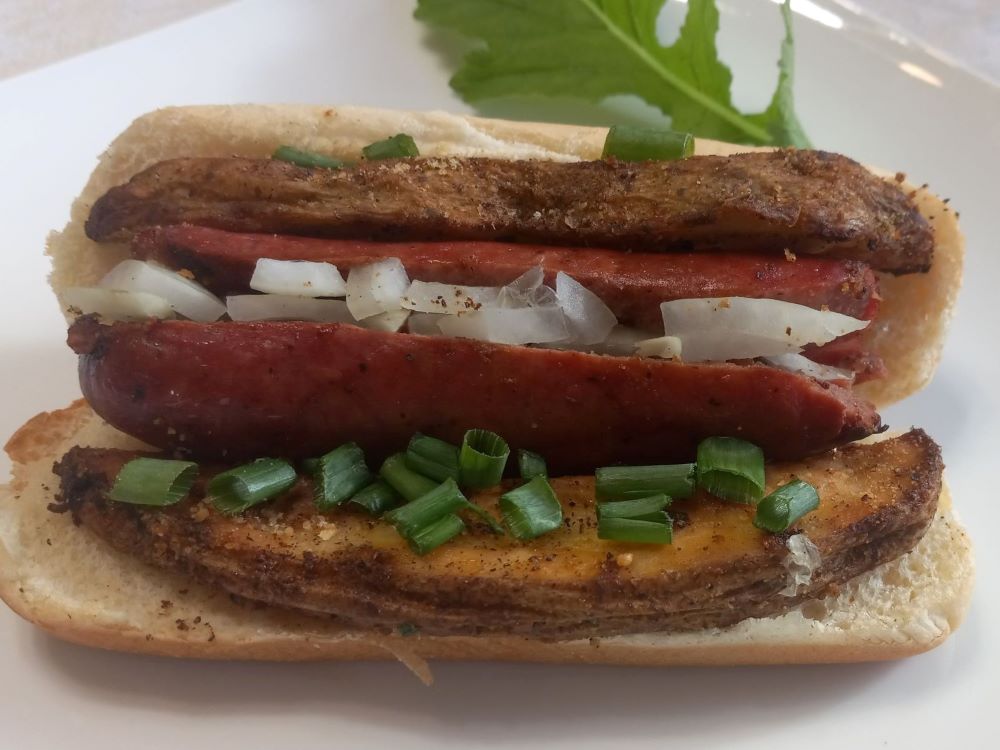
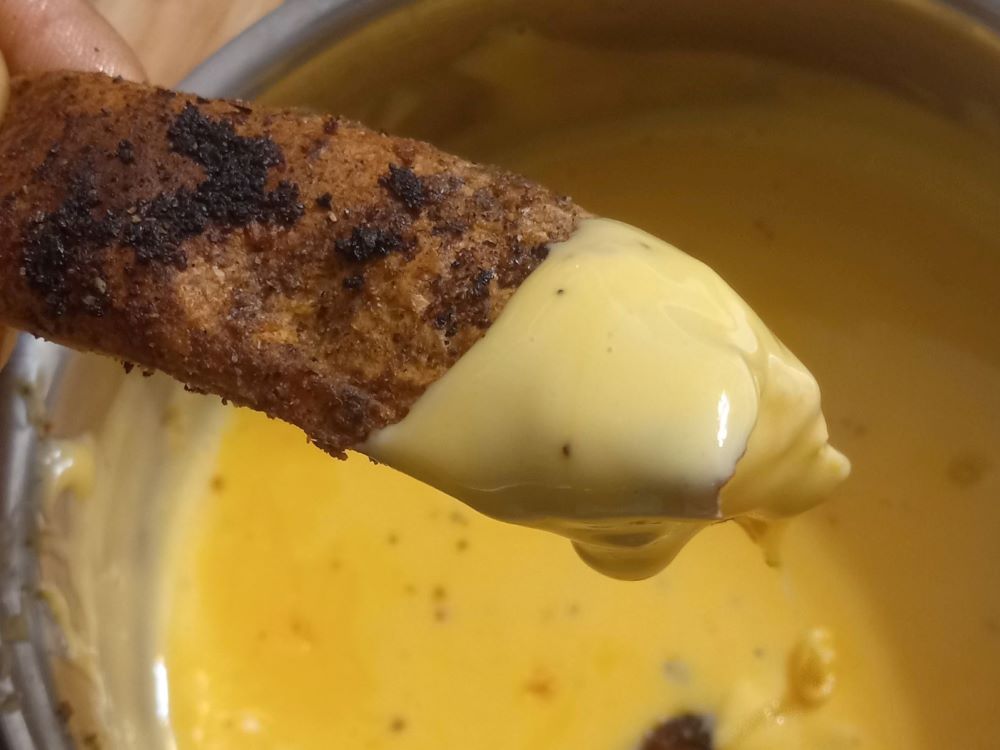
*"The king of crunch bread!" If you love to dip your breadstick into pasta sauce, spread your butter or cream cheese on a soft center of super crunchy morning roll with coffee, or make a soup bread bowl to fill with chili or stew, this recipe is a must have: boil your raw dough right before baking it. Some simply brush it with water, some bake it in the cast iron or dutch oven pan, and I boil it like a pretzel!
1. Preheat oven 350F. Roll dough from the fridge to approximately 1-inch thick logs desired length for breadsticks or 4-inch circle buns. Leave on the counter to come to room temperature for 15-45 mins.
2. Bring water to boil, drop your bread sticks and dinner soup rolls into boiling water. Boil at 1 minute, flip, boil another minute. The longer boiling time, the crunchier the outside. (Go ahead and experiment up to 3 minutes boiling on each side, but be careful to watch out for cracking and separating on older doughs (if left longer than 2 days in the fridge). It will glue back together a little during baking.
3. Back on center rack 30-40 minutes for breadsticks and 40-50 minutes for dinner rolls. You can flip them midway if extra crunch is desired on top and bottom.
4. For a chili bread bowl, bake time will vary depending on the size formed. You can also bake these in the cast iron pan at 425F with the lid on for the first half of the bake time and without the lid for the remaining 20-30 minutes.
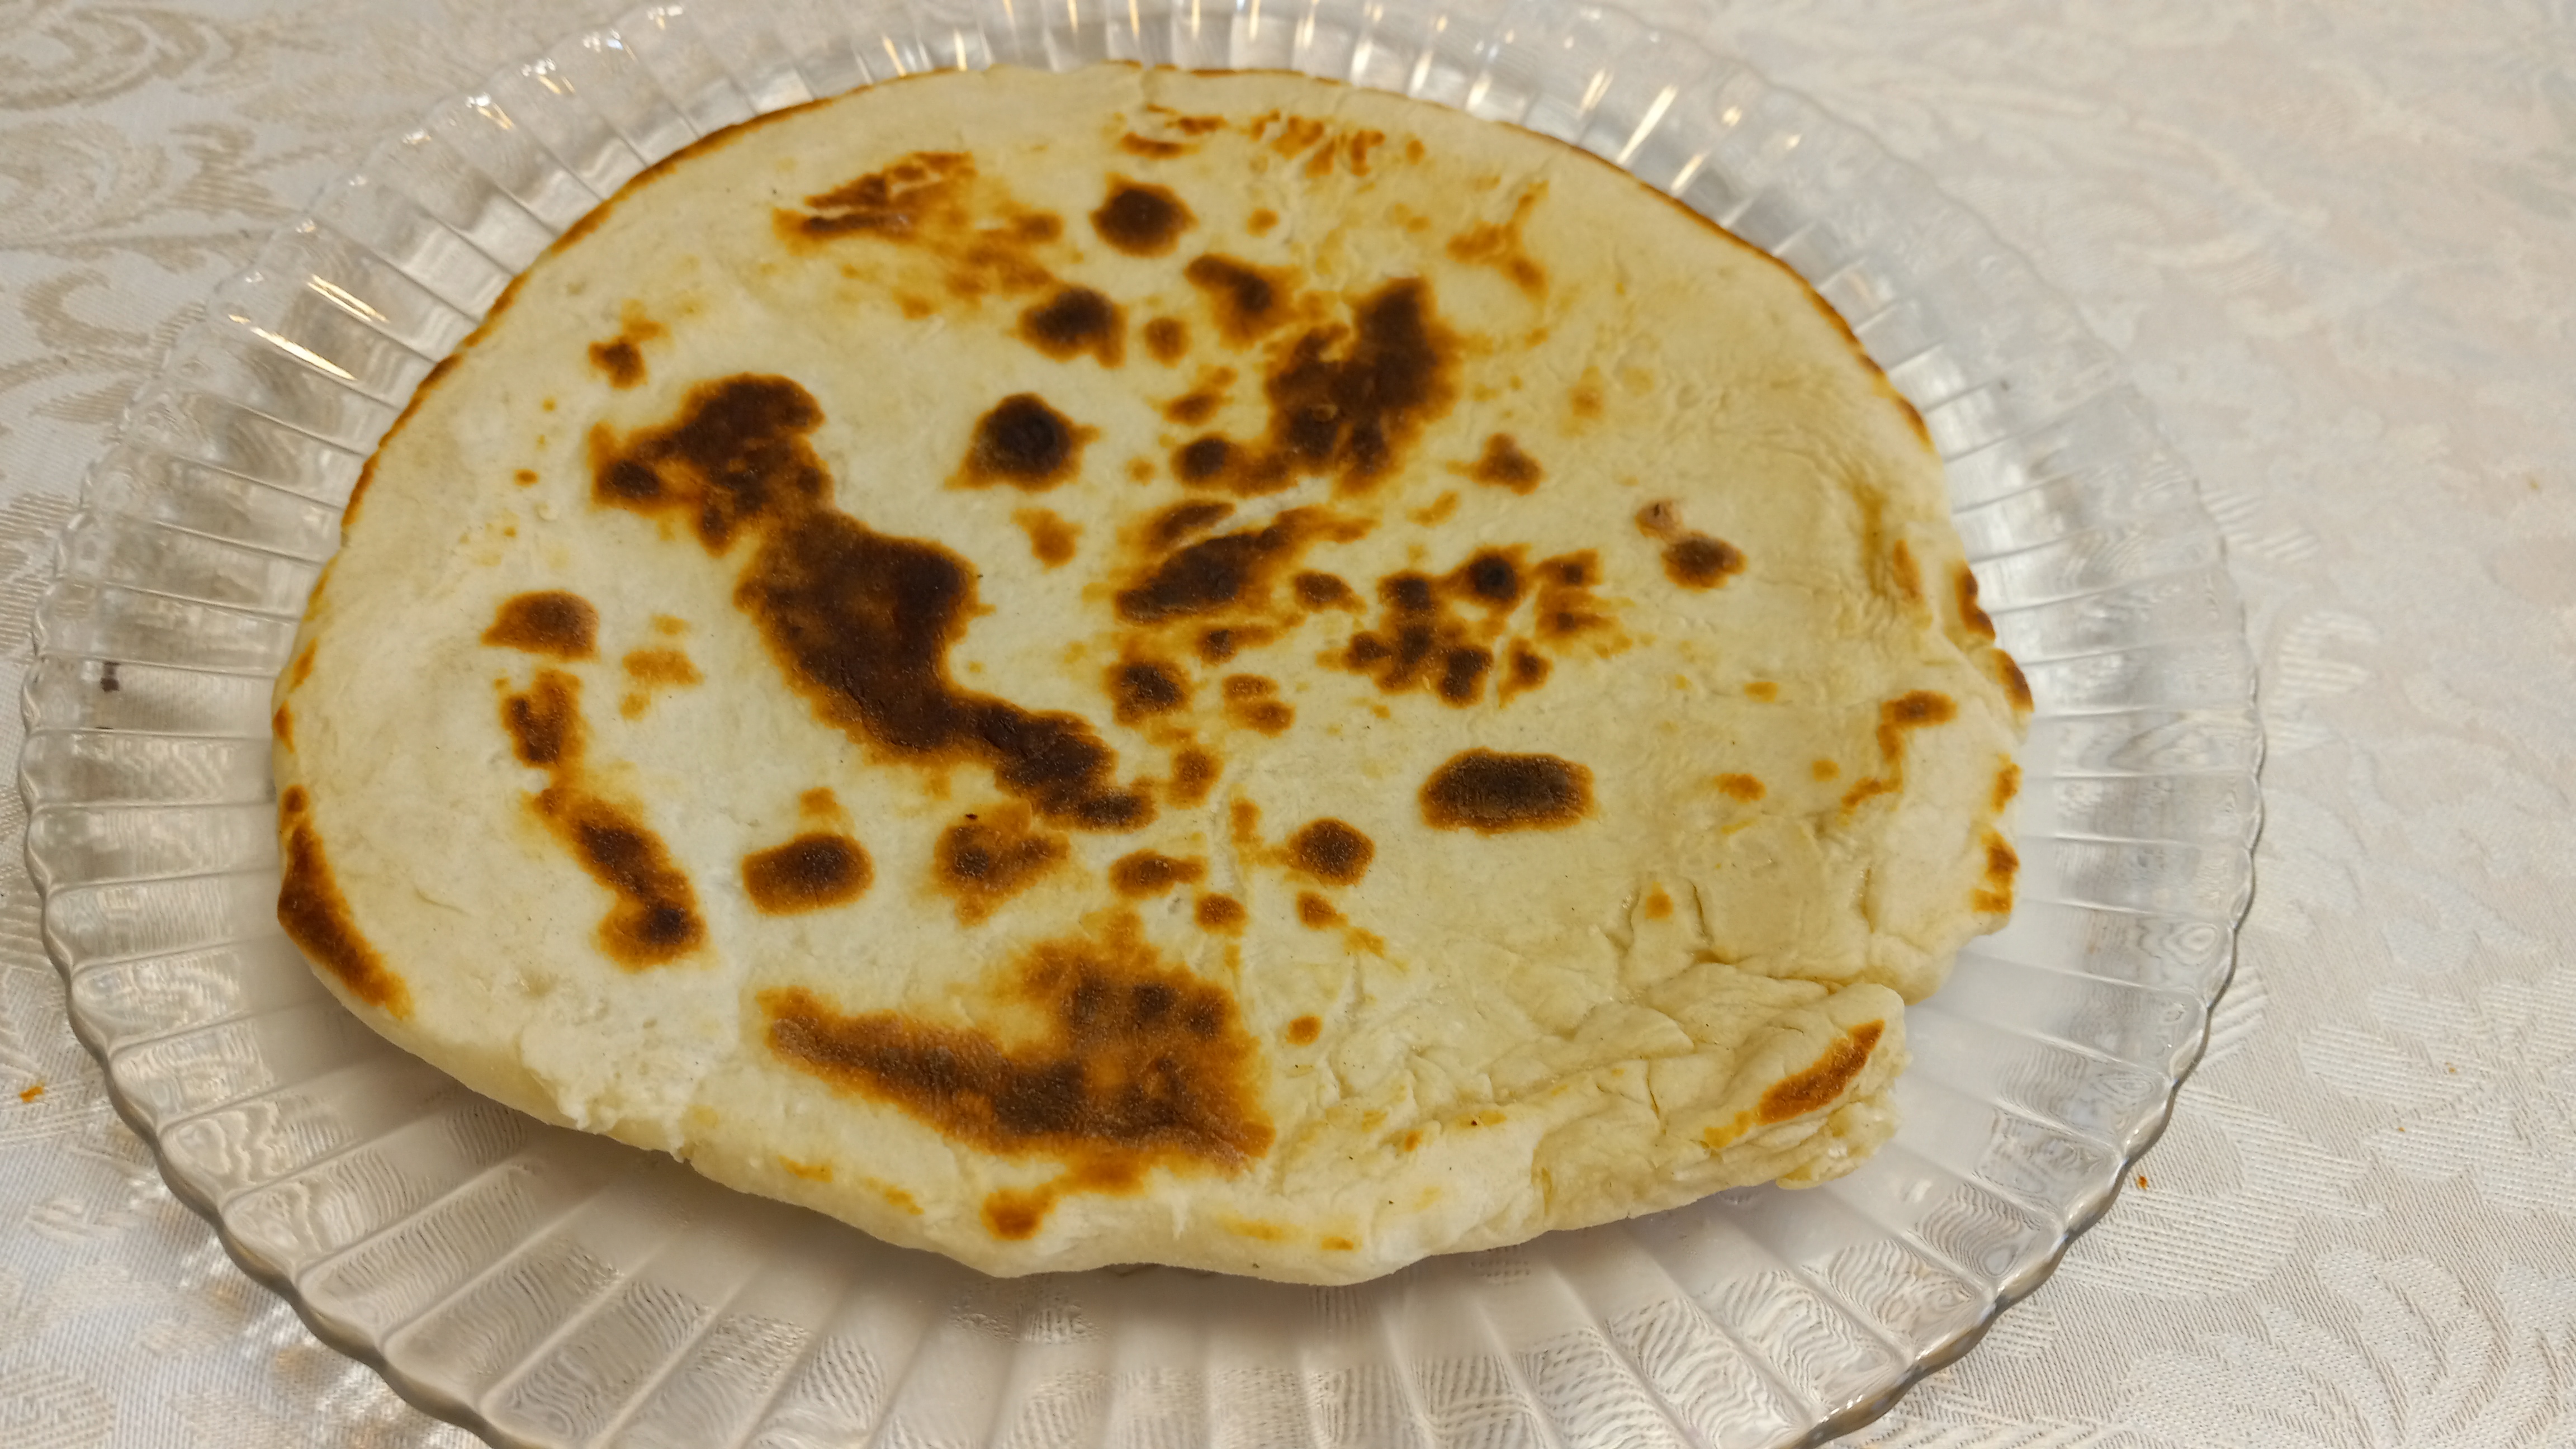
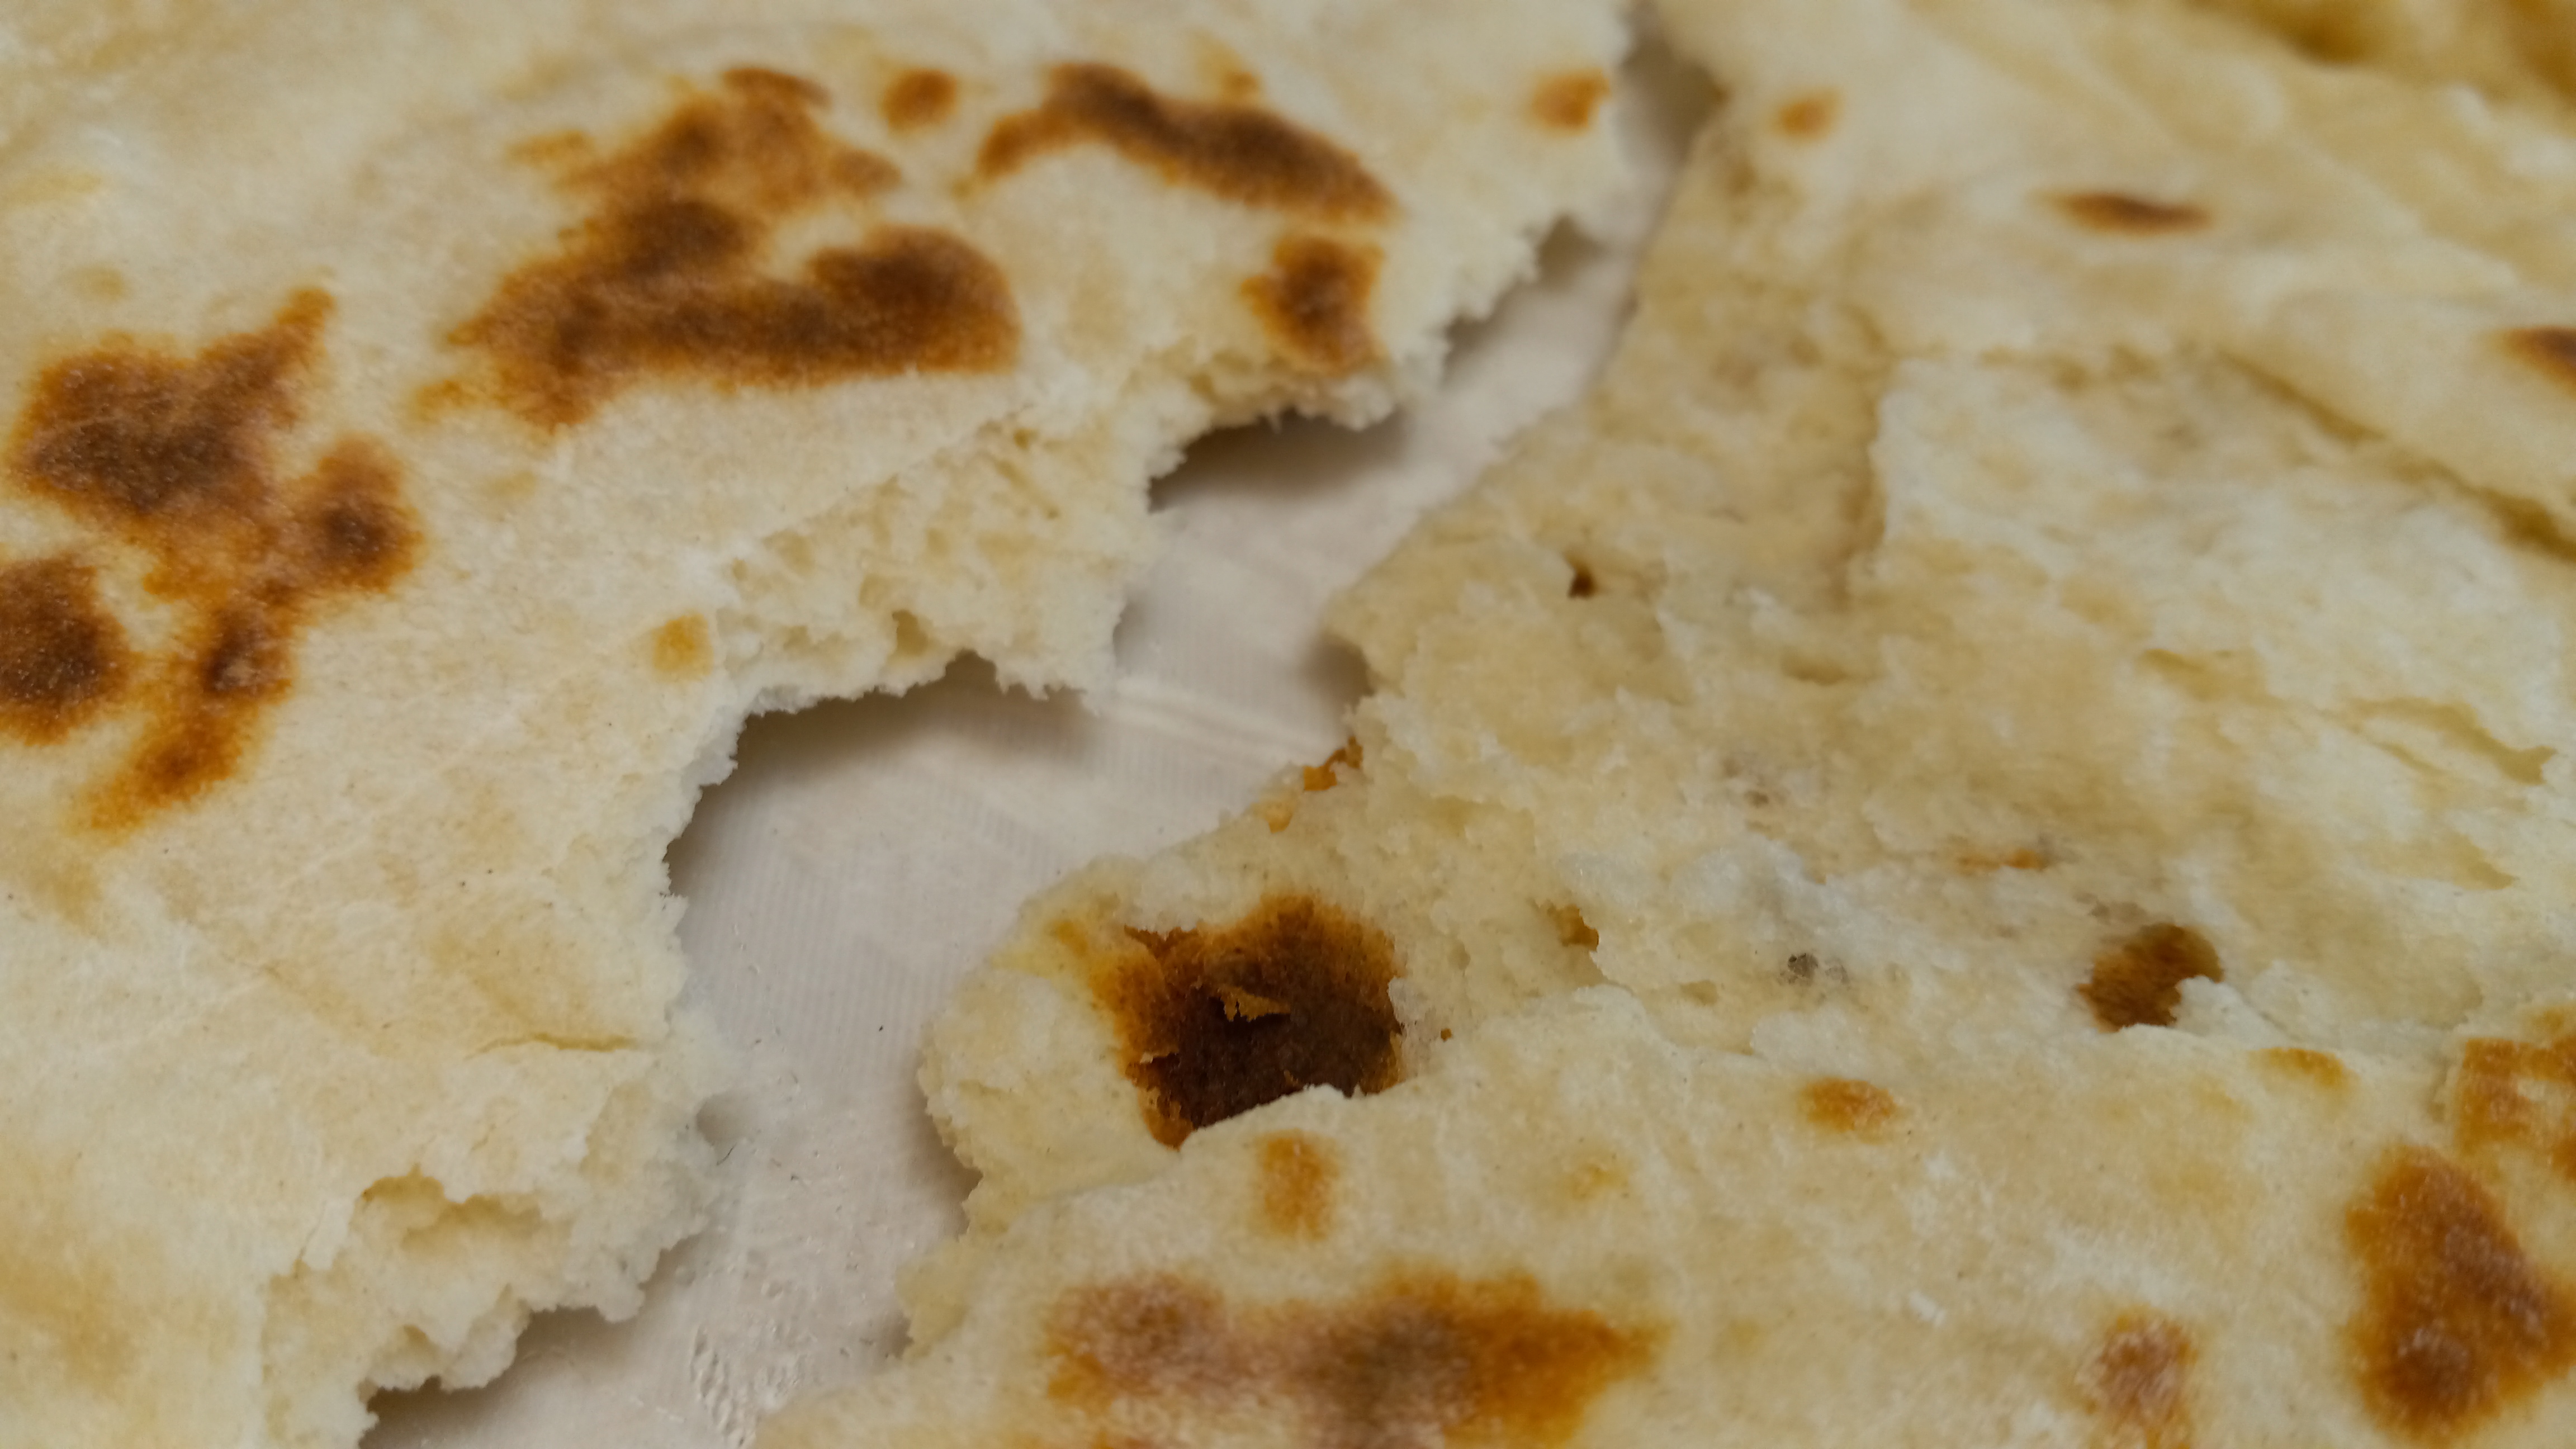
FOR FLATBREADS CHALUPA-STYLE TORTILLAS:
Roll out to 1/4 inch circles, preheat non-stick frying pan to medium heat, fry without oil on each side flipping over after 30 seconds several times until desired browness achieved.
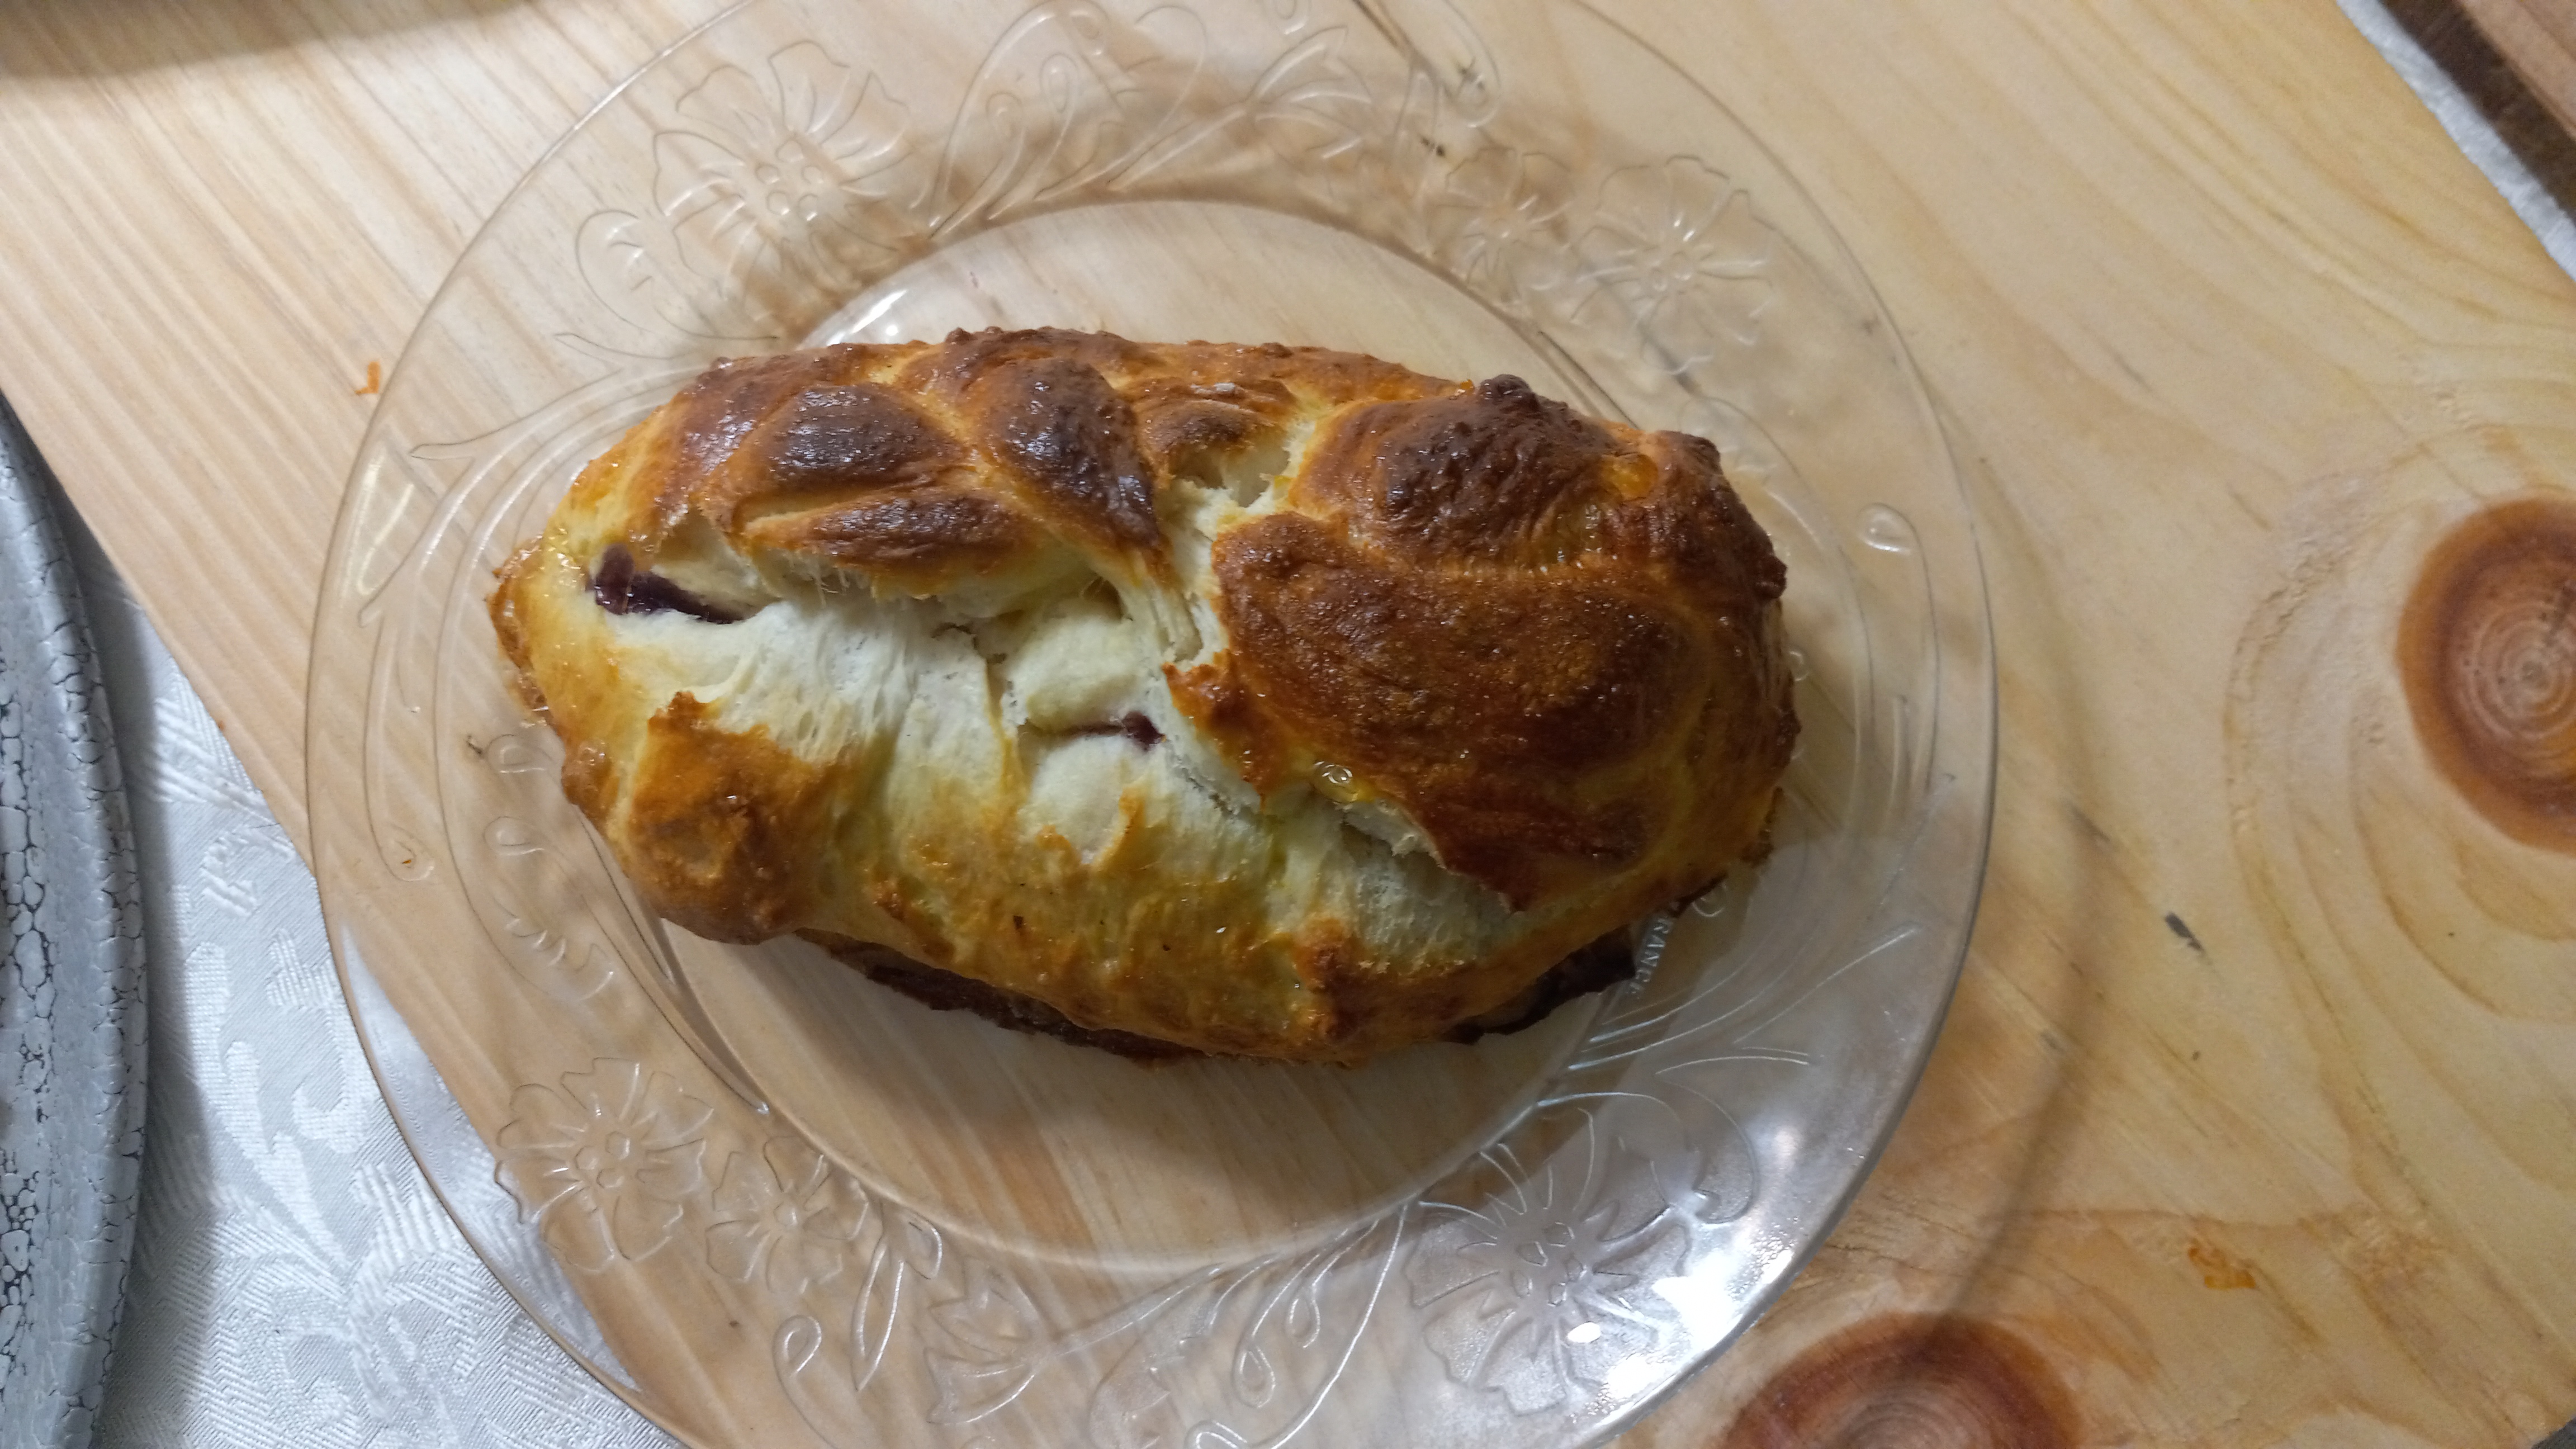
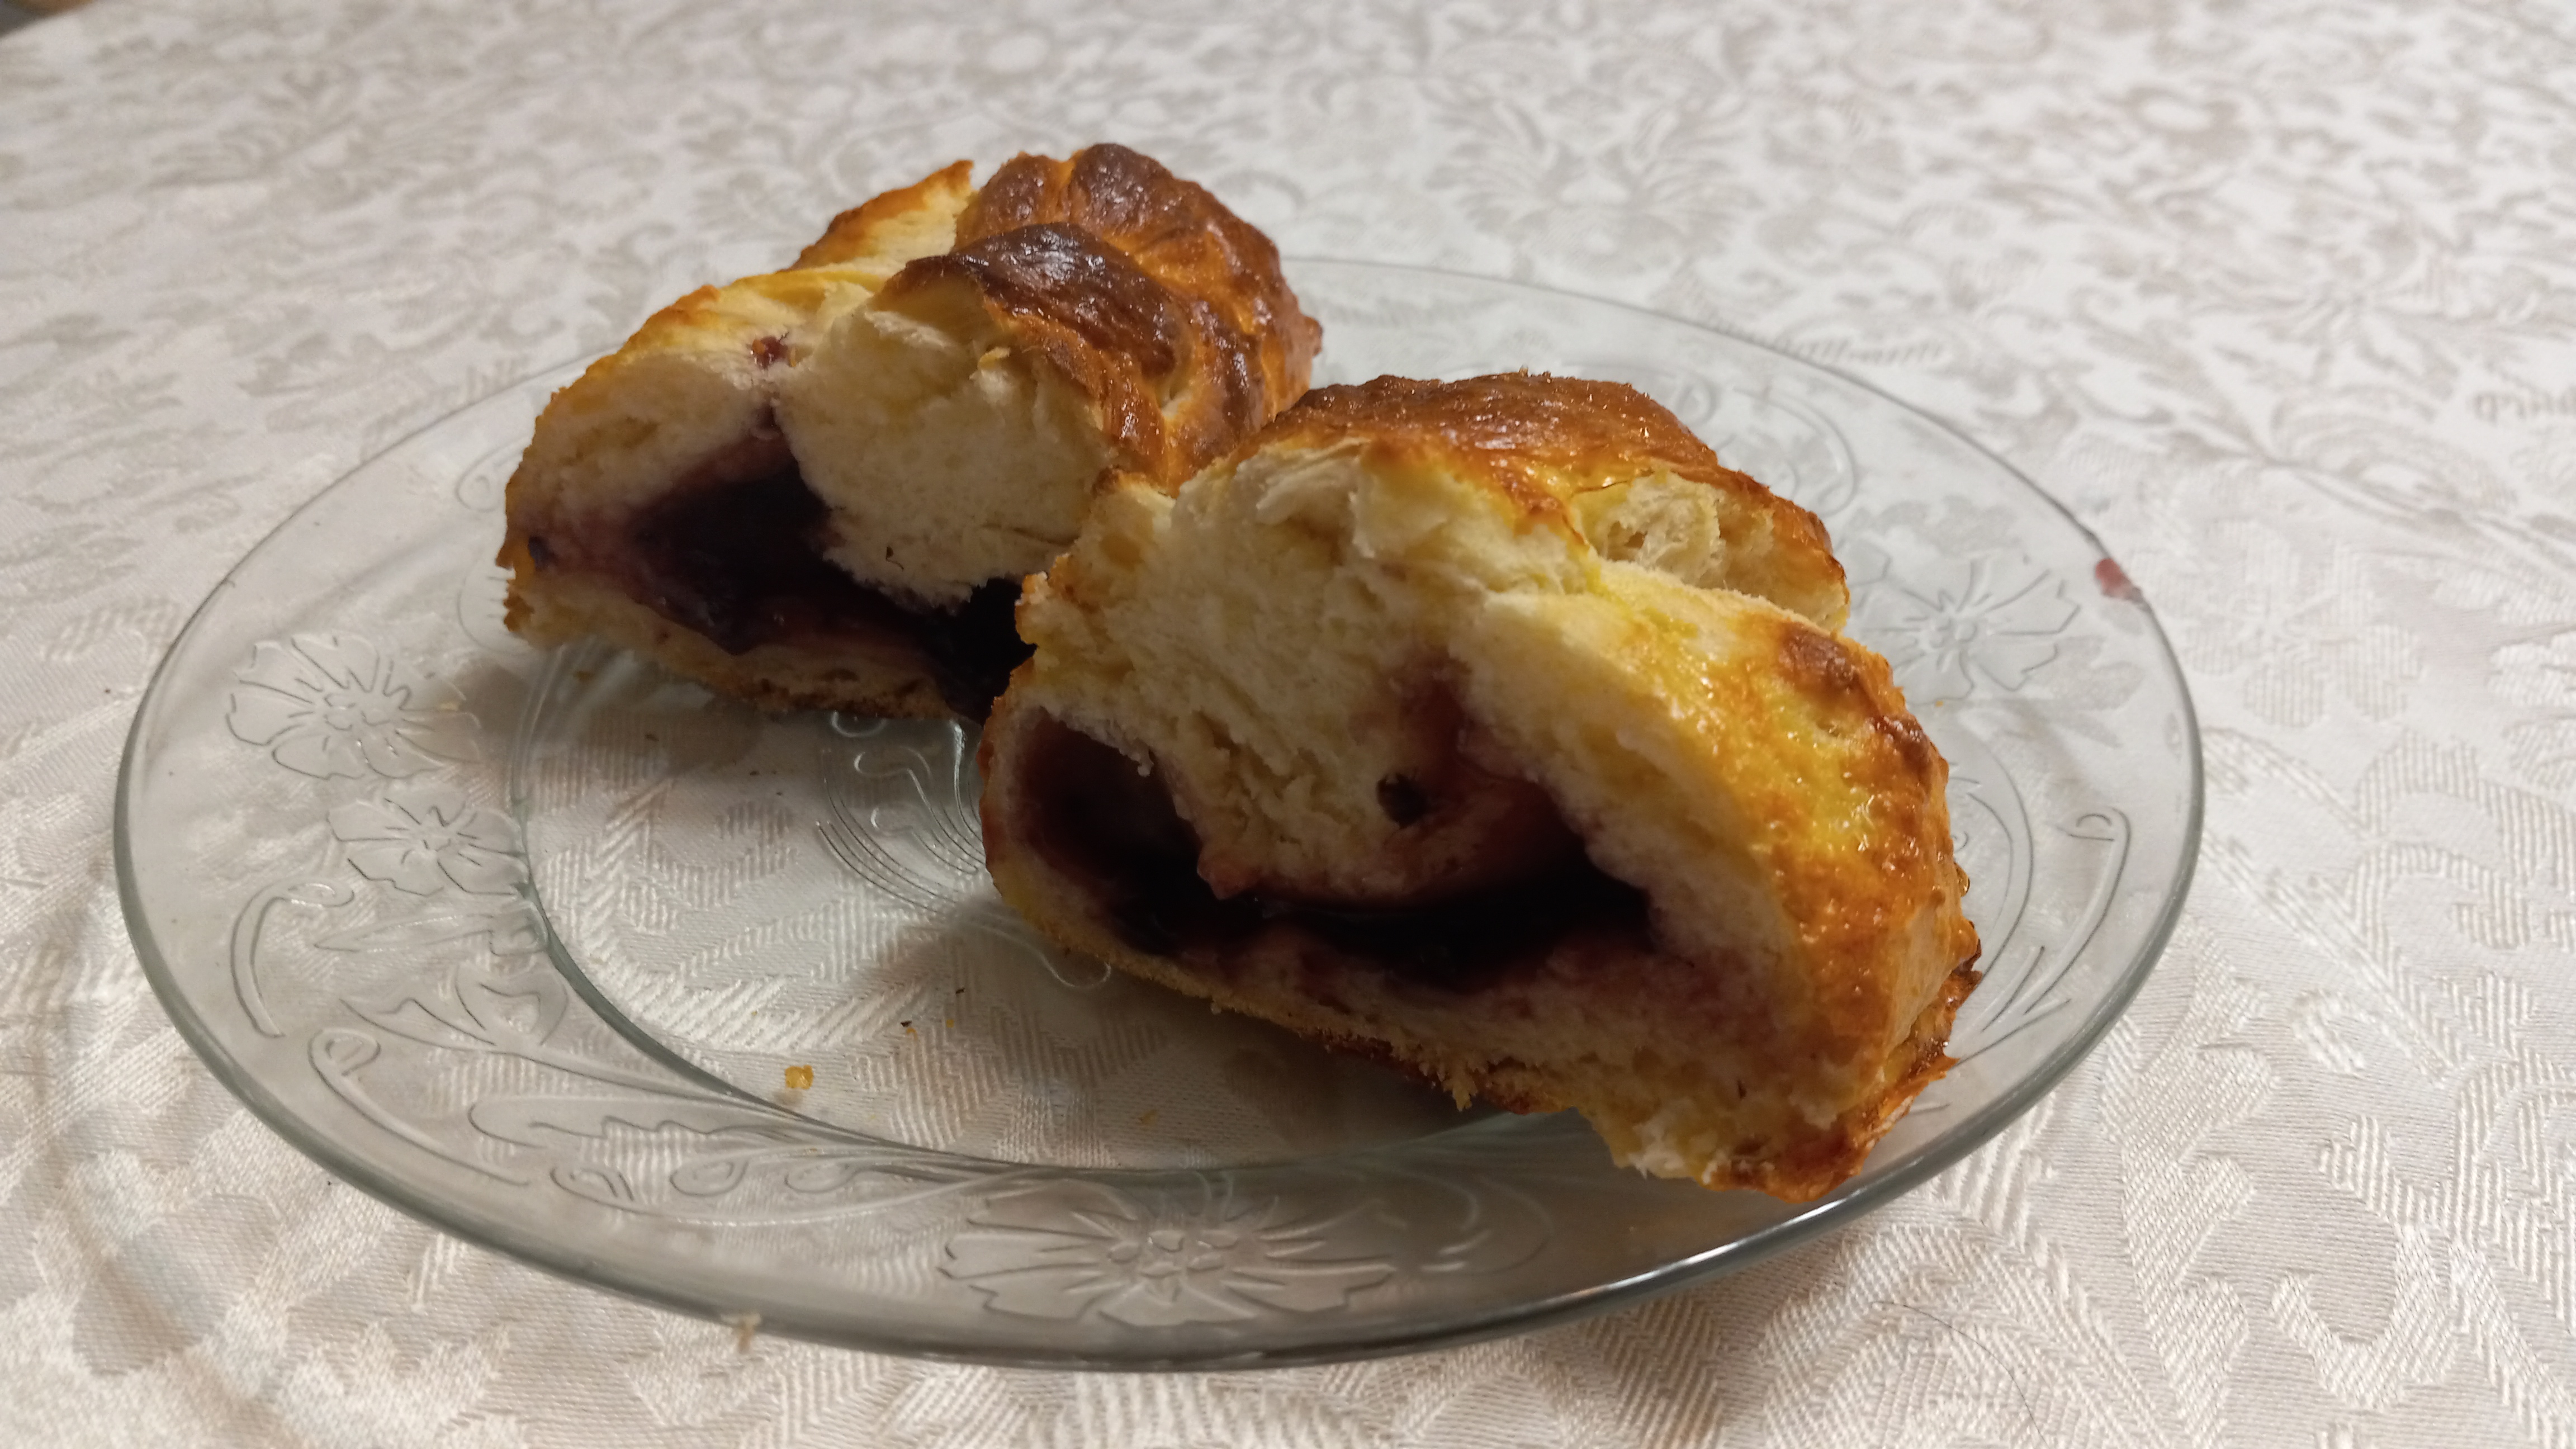
FOR PASTRIES WITH FILLING (PIROGI)
1. Preheat oven 350F. Roll dough to 1/4 inch thick circles approximately 6 inches in diameter. Place filling in the center and seal edges after folding in half (forming D-shape). If filling is runny, add flour or cornstarch to jelly or jam. You can stuff dry fruits and berries, cream cheese with powdered sugar, pumpkin with cinnamon, etc. Do not overfill to prevent tearing when wrapping.
2. Apply egg wash if extra golden color desired (beat plain egg and brush on top). Bake for 30-40 minutes.